Investment Account Management
The investment account serves to capture the relationship between an investor and a fund for a specific holding. To support the effective management of investment accounts two new task types have been introduced: the Investment Account and Bank Account tasks.
The Investment Account task allows users to effortlessly capture and manage multiple investment accounts, seamlessly linking an investor to a fund and the applicable fund share class (share classes must be captured as products).
The bank account task is a standalone task that offers a seamless method for capturing and automatically associating bank account details with an investor (i.e. an entity). If bank accounts are captured against the investor, then they may be linked directly to an investment account.
Combining the capture of bank and investment accounts, for an investor, delivers enhanced comprehension and visualization of the investment account providing users with a more insightful and intuitive experience.
The following user guides covers the application of both the Investment and Bank Account Tasks in a journey.
Note: Investment and Bank Account Task functionality must be specifically enabled by a Fenergo SaaS Administrator. If you are interested in Product Enablement and don’t currently have it enabled, please speak to support for more information.
Adding and Editing Bank Accounts
To capture a bank account for an investor, follow the steps below.
-
Open an in-progress bank account task in a journey.
-
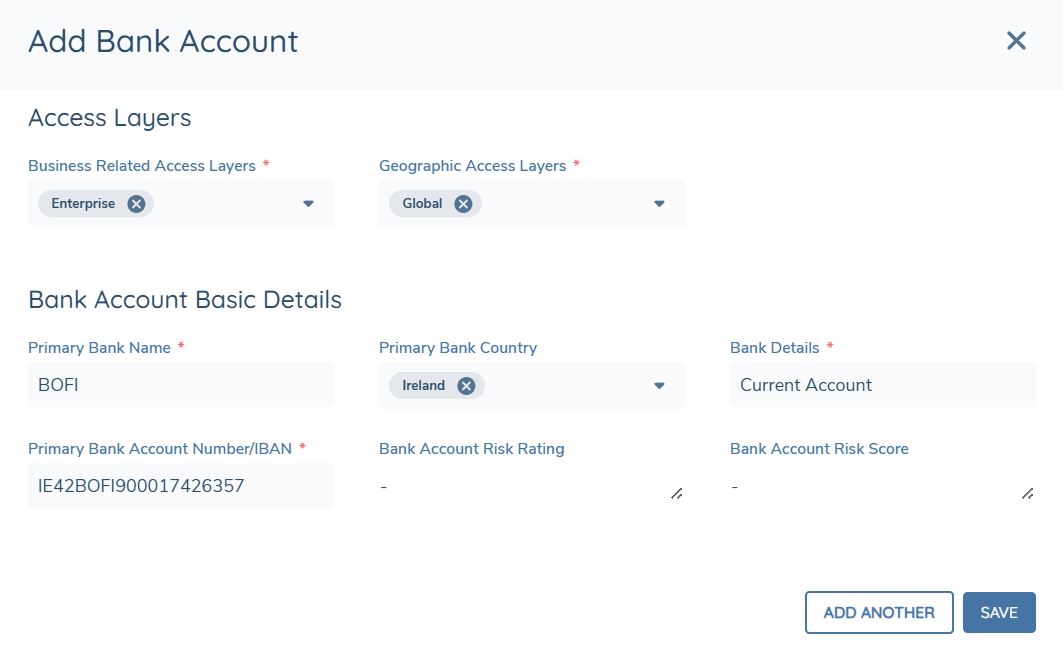
Select the ADD BANK ACCOUNT button.
This will open the Add Bank Account window. The sections and fields displayed will be dependent on the task configuration.
-
Capture the required information and select Save.
This will create the bank account and automatically link it to the entity for which the journey is in progress.
On save both a verified and draft record of the bank account will be created, and the bank account will be linked directly to the investor (i.e. the entity for which the journey is in progress).
Having added a single Bank Account additional bank accounts may be added by selecting the ADD ANOTHER button from the Add Bank Account window or the ADD button above the Accounts grid in the task.

To edit a bank account, select the pencil icon, to the right of a record displayed in the bank account table. In editing a bank account that was previously verified it will create a draft of the bank account in the context of the ongoing journey.
Currently there is no snapshotting of the Bank Account task in a journey. Therefore, when returning to a completed Bank Account task, all verified bank accounts for an entity will be shown with the most recent data.
Investment Accounts: Default name generation including Fund Product Type
When creating or editing an Investment Account, you can have the system automatically generate the Investment Account name based on the linked Entity, Fund, and (optionally) Fund Product.
Before you begin
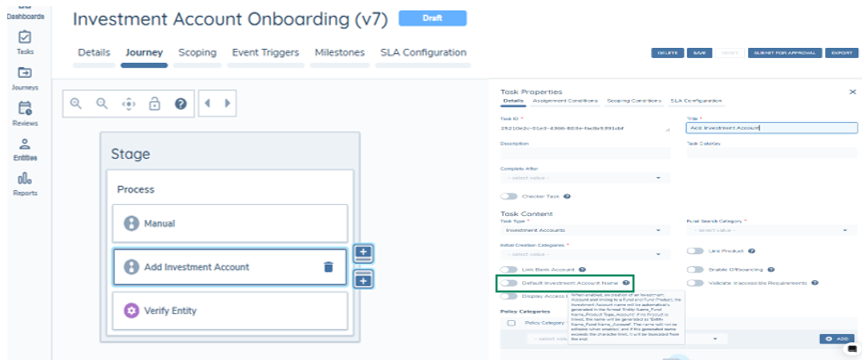
- This behaviour is controlled by the existing Default Investment Account Name toggle in the journey builder.
How automatic naming works
When Default Investment Account Name is enabled, the Investment Account name is not editable. The system generates the name using underscores between segments.
Naming formats
-
No Fund linked
EntityName_Account -
Fund linked, no Product linked
EntityName_FundName_Account -
Fund and Product linked
EntityName_FundName_ProductType_Account
ProductTypeis taken from the linked Fund Product’s Product Type.
Character limit and truncation
If the generated name exceeds the configured character limit, the system truncates the name from the end. No special prioritisation is applied to preserve specific segments.
If Default Investment Account Name is disabled:
- The Investment Account name field remains editable.
- Linking or changing a Fund or Product does not auto-generate or update the name.
Updated tooltip text
Hover over the information icon beside Default Investment Account Name to see the updated tooltip:
“When enabled, on creation of an Investment Account and linking to a Fund and Fund Product, the Investment Account name will be automatically generated in the format ‘Entity Name_Fund Name_Product Type_Account’.
If no Product is linked, the name will be generated as ‘Entity Name_Fund Name_Account’. The name will not be editable when enabled, and if the generated name exceeds the character limit, it will be truncated from the end.”
Automatic Investment Account Name Updates
When the Default Investment Account Name toggle is enabled, Investment Account names will now automatically update throughout the lifecycle of the account, not just at the point of creation. Each time the Investment Account task is saved or completed, the name is regenerated using the Investor's current name from the active journey alongside the verified Fund and Fund Product names, ensuring it stays consistent with the latest entity data.
A new toggle — Update Investment Account Names During Verification — is available in the Verification Task configuration panel. When enabled, the verification process will automatically refresh the names of all draft Investment Accounts in the journey before verification completes. This toggle is disabled by default and only takes effect when the Default Investment Account Name toggle is also enabled.
All automatic name updates are recorded in the Investment Account audit trail and attributed to System.
Bank Account Associations & Deletion
Overview
This section describes:
- How users can view Investment Accounts associated with a Bank Account
- How verified Bank Accounts can be deleted from an Entity
- The permissions and security controls governing this behaviour
These capabilities apply within the Bank Account task and are enforced according to user access permissions and Account Control Configuration.
View Related Investment Accounts
When working with a Bank Account, users can view any associated Investment Accounts directly from the Bank Account task.
Configuration
The display of associated Investment Accounts is controlled through Account Control Configuration.
A configuration toggle allows authorised configuration users to enable or disable the display of Investment Account associations on the Bank Account task. See Account Control Configuration for details.
Access Control
Only Investment Accounts for which the user has read access are displayed.
If a Bank Account is associated with multiple Investment Accounts but the user does not have access to all of them:
- Only accessible Investment Accounts are shown.
- The system does not indicate that additional inaccessible Investment Accounts exist.
This ensures consistency with the platform’s Access Layer and role-based security model.
Viewing Associations
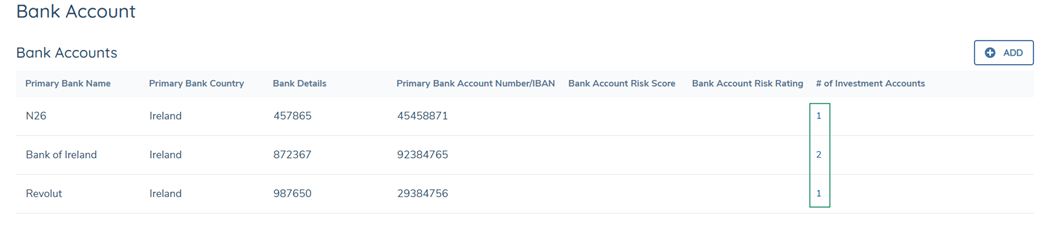
Within the Bank Account task:
- The system displays the number of associated Investment Accounts.
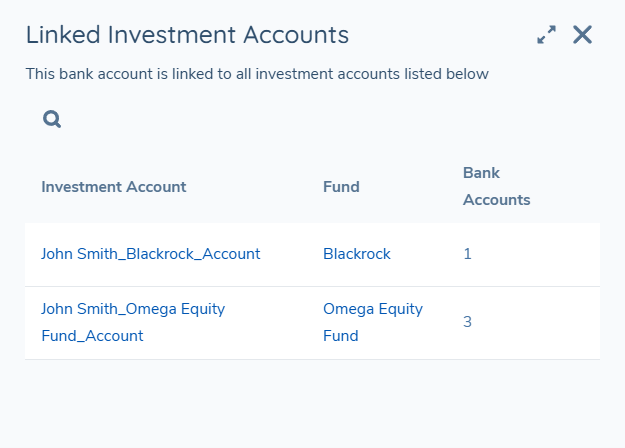
- Selecting this number opens a read-only panel displaying Investment Account details.
The panel:
- Is informational only.
- Does not allow editing.
- Does not allow navigation to modify linked Investment Accounts.
Delete Verified Bank Accounts from an Entity
Verified Bank Accounts can be deleted from an Entity, subject to appropriate permissions.
Deletion removes the Bank Account relationship from the Entity and all linked Investment Accounts.
Permissions
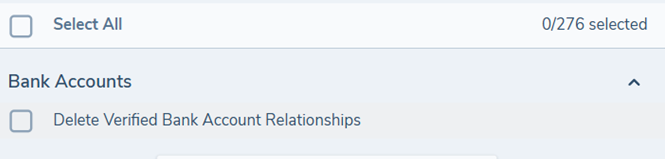
To delete a verified Bank Account, users must be assigned the following permission:
Delete Verified Bank Account Relationships
This permission is configured in:
Team Security Configuration → Bank Accounts
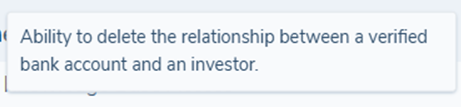
When hovering over the permission in configuration, a tooltip is displayed describing its impact.
If the permission is not assigned:
- The Delete option is not available.
- Users cannot remove verified Bank Account relationships.
Delete a Verified Bank Account
Once a Bank Account has been added to an Entity and verified, it can be deleted regardless of whether it is linked to Investment Accounts.
To delete a verified Bank Account:
- Navigate to the Bank Account task.
- Select Delete from the available actions.
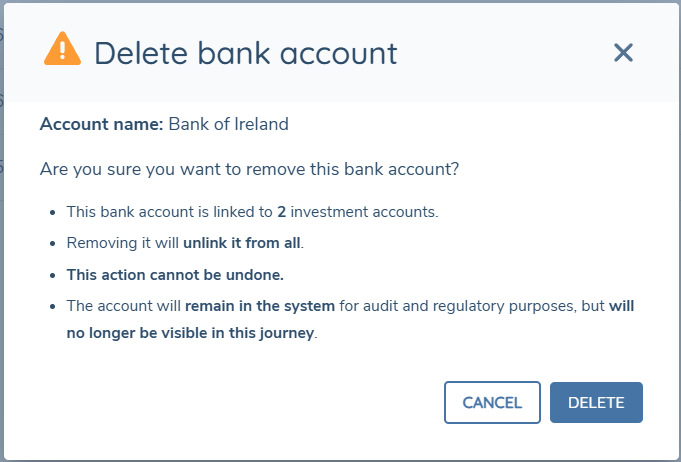
- Review the confirmation modal.
The confirmation modal:
- Displays the number of Investment Accounts linked to the Bank Account.
- Warns of the consequences of deletion.
- Requires explicit confirmation before proceeding.
Impact of Deletion
Before deletion:
- Linked Bank Accounts remain visible within the Investment Account grid.
After deletion:
- The Bank Account is removed from the Entity.
- The Bank Account is removed from all associated Investment Accounts.
- The deleted Bank Account cannot be found or selected when attempting to link a new Bank Account.
Deletion is permanent and cannot be undone through the UI.
Adding and Editing an Investment Account
The capture of the investment follows a similar process to that of the bank account but is extended to support additional functionality including the linking of Funds and Bank Accounts.
To capture an investment account, follow the steps below.
-
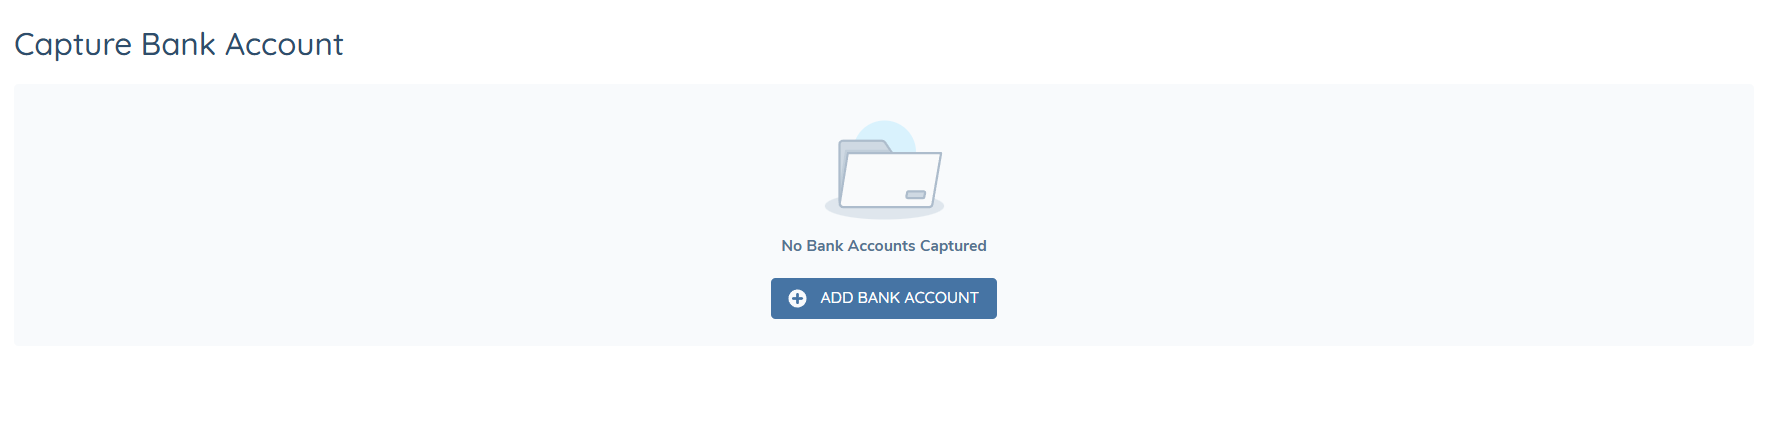
Open an in-progress Investment Account task in a journey. If no investment accounts exist for an entity, the default landing page is displayed as below.
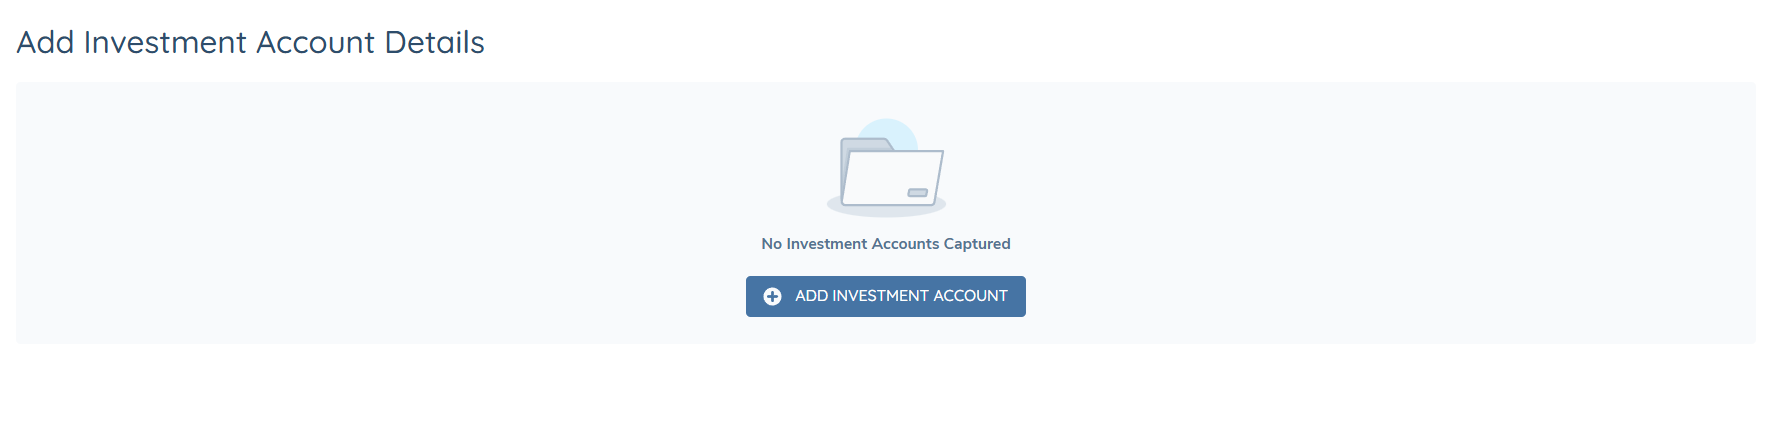
-
Select the ADD INVESTMENT ACCOUNT button opening the Add Investment Account window.
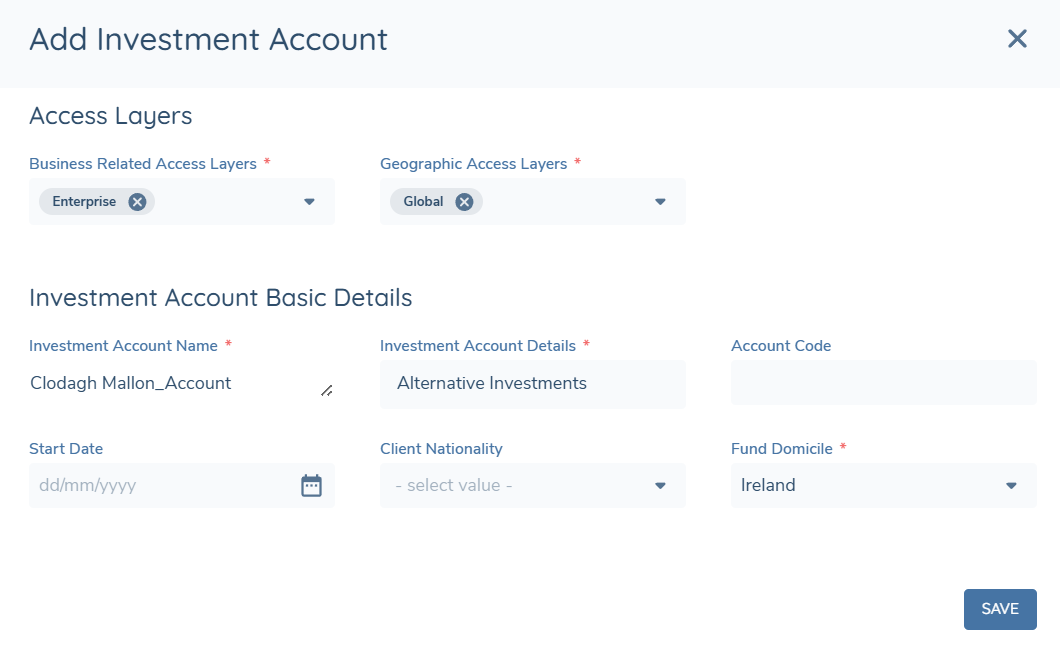
This window will display those categories as configured at the task level in the Initial Creation Categories. It is recommended that the categories configured are limited to deliver a better user experience. Please refer to the Configuration Guide for more information.
-
Capture all the mandatory requirements and select save.
On save both a verified and draft record of the investment account will be created, and the investment account will be linked directly to the investor (i.e. the entity for which the journey is in progress). The user will then be displayed the Investment Account Details page on which additional information can be captured.
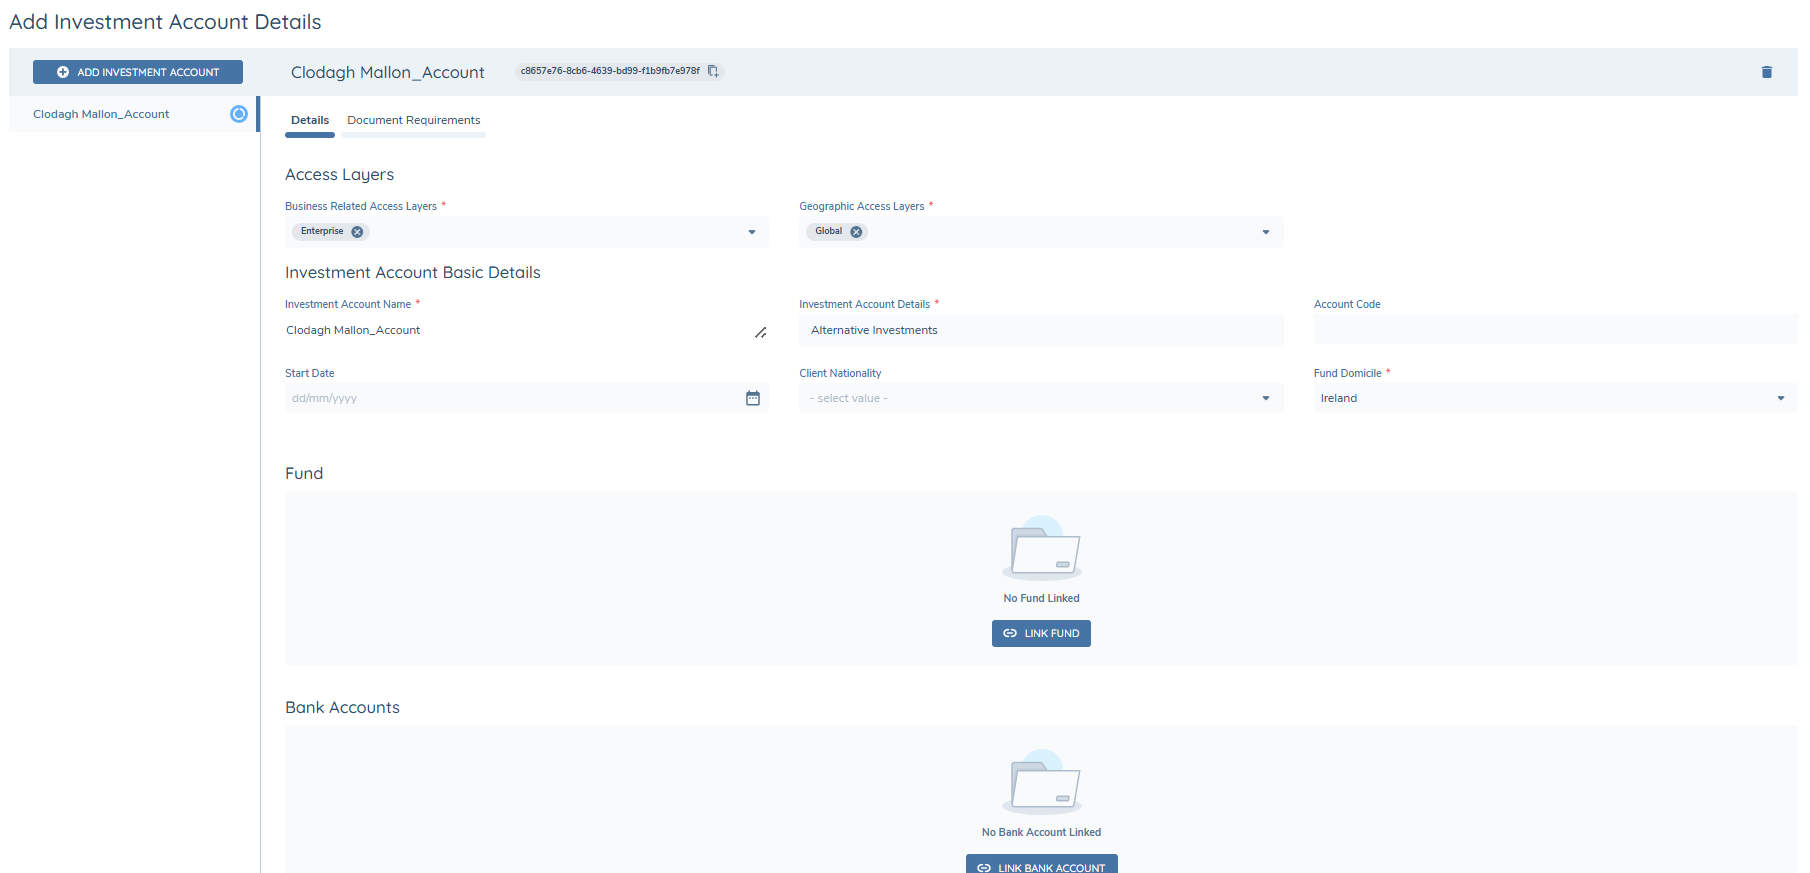
The categories and fields displayed on the Investment Account Details page will be dependent on the task configuration.
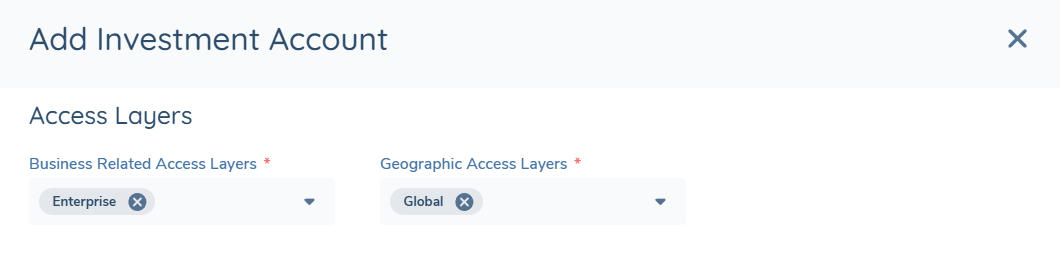
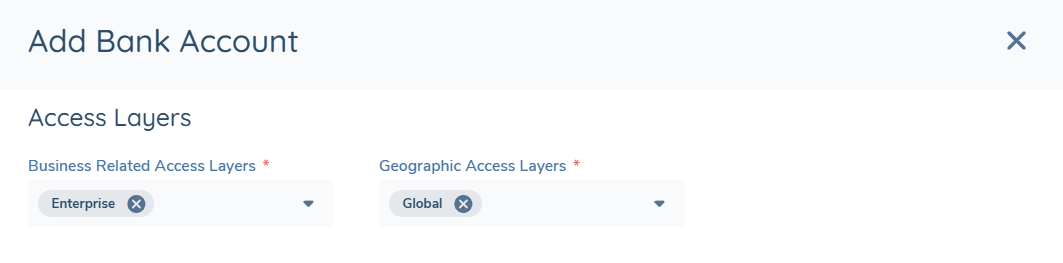
Access Layers on Investment Accounts and Bank Accounts
When creating a bank account or an investment account, access layers must be captured on the Add Investment Account modal and the Add Bank Account modal. This will ensure that from the time of creation only authorised users will be able to access the accounts. When accounts are brought into draft by clicking the edit icon in the investment account and/or bank account task, the access layers of the accounts can be updated.
If the ‘Populate default layer values when entities are created’ toggle is enabled in Security Configuration, the access layers will default to that of the entity for which they were created.

If Dynamic Access Layer Assignment is enabled, the access layers will be automatically assigned to the account based on the configured rules, and the access layer fields will be read-only. When Dynamic Assignment is enabled, the access layers on investment accounts can be viewed by clicking the kebab icon in the investment account task. To learn more about configuring Dynamic Access Layers for investment accounts, please see the Access Management Guide.
![]()
If a user has the applicable search access layers for an account, but not the applicable entity access layer, the user will only see the name of the account. All other information pertaining to the account will be hidden. To view the access layer assigned to the account to which the user only has the applicable search access layer, the user can click the kebab icon located beside the account.
Adding additional Investment Accounts
Having added a single investment account for an entity, additional investment accounts may be added by selecting the ADD ACCOUNT button from the header of the task. As investment accounts are added, the left-hand column will list the investment accounts.
On selecting SAVE or COMPLETE on the task any investment accounts where information has been captured or edited will be updated. To navigate between investment account simply click on the name of the applicable investment account in the left-hand column.
To edit a verified investment account, select the pencil icon, displayed in the task header. In editing a verified investment Account, it will create a draft of the investment account in the context of the ongoing journey.
Currently there is no snapshotting of the Investment Account task in a journey. Therefore, when returning to a completed Investment Account task, all verified investment accounts for an entity will be shown with the most recent data.
Linking a Fund to the Investment Account
The Investment Account task allows for the search and linking of a Fund (i.e. entity of type company) directly to the investment account. Only a single fund may be linked to the investment account.
To link a fund to an investment account, follow the steps below.
-
Select the Link Fund button displayed in the Fund Grid.

-
In the Search for Fund Modal capture the required details and select Search.

On completing the search, the applicable results will be returned. Having completed the search if no results are returned select the back button to navigate back to the search criteria.
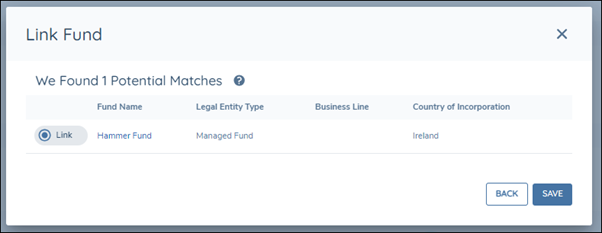
-
From the results select the required Fund and select SAVE.
On selecting SAVE the fund will be linked to the investment account and will be displayed in the table.
How Funds Affect Investor Requirements
When you link a Fund to an Investment Account, Fenergo uses the Fund as a source of information to determine which requirements and policies apply to the Investor (the root entity for which the Investment Account is created). Verified Fund data is used to assess whether specific Investor requirements should apply.
What Happens When a Fund Is Linked
The Fund is treated as an Account Related Fund for the Investor.
Verified Fund details are used to evaluate applicable Investor requirements and policies.
When Requirements Are Updated
Investor requirements and policies are automatically re-evaluated when a Fund is:
-
Linked to an Investment Account
-
Unlinked from an Investment Account
-
The investment account task is Saved or completed
Following the above Fenergo will automatically:
-
Reassess Investor requirements that depend on linked Funds
-
Update related Investor fields (for example, setting a Related Fund in Scope indicator to Yes or No)
-
Add or remove Investor policies as required
Important Things to Know
-
Linked Funds do not create requirements on the Investment Account itself.
-
Funds only affect requirements and policies at the Investor level.
This behaviour is driven by system configuration. Which Funds influence Investor requirements and policies depends on how rules and policies are configured in your Fenergo implementation.
Linking a Funds Product to the Investment Account
If a fund is linked to an investment account, users can also link a funds available product. This functionality enables users to capture and provide a deeper understanding of the purpose behind the investment account.
Only a single product may be linked to the investment account. Following verification, it is not possible to remove or edit the link to the product.
The ability to link a funds product to an investment account must be enabled at the task level within the journey configuration. If this capability is not enabled, users will only be able to link a fund.
To link a funds product to an investment account, follow the steps below.
-
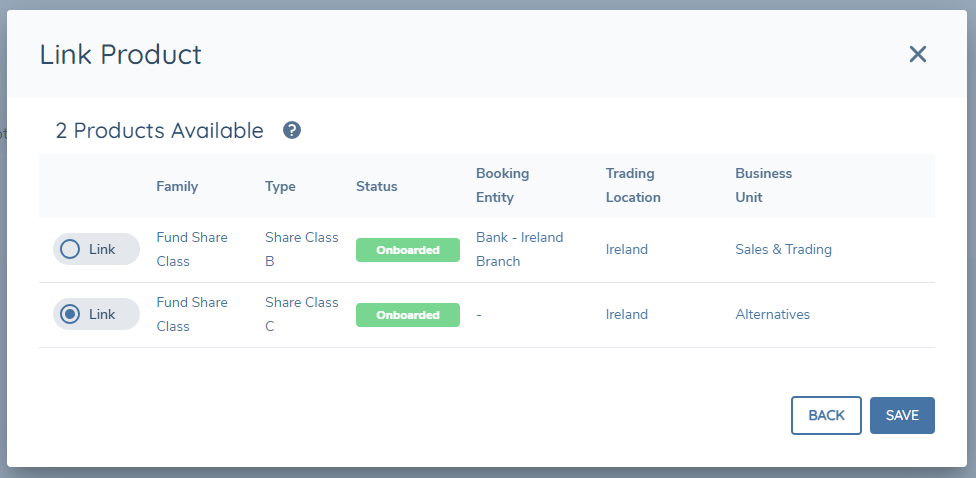
Following the fund search and having selected a fund from the results returned, select the continue button. The continue button is only available if the link product functionality is enabled. This will display the Link Product window.
-
Select the appropriate product from those available.
-
Select Save.
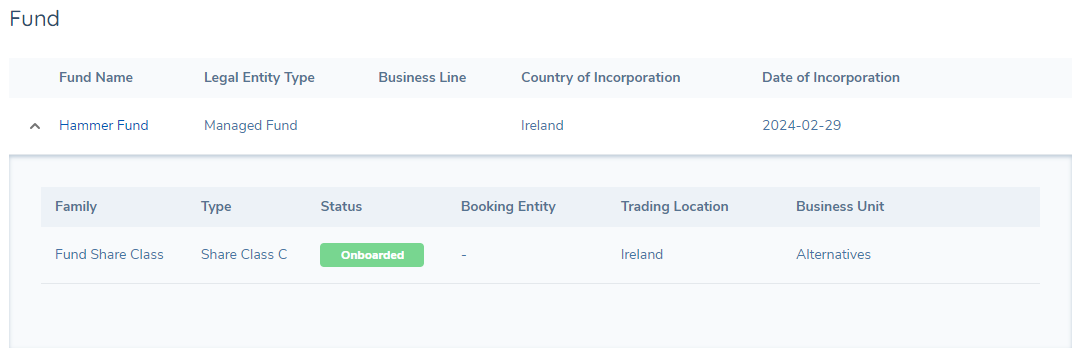
On selecting save the window will be closed and the Fund selected will be displayed in the Fund Grid. On expanding the grid the product selected will be displayed.
Unlinking a Fund from the Investment Account
To remove an existing Fund relationship from an Investment Account:
-
In the Investment Account task, navigate to the Fund section.
-
Select the Unlink icon beside the linked Fund.

-
In the confirmation modal, review the Fund details shown.
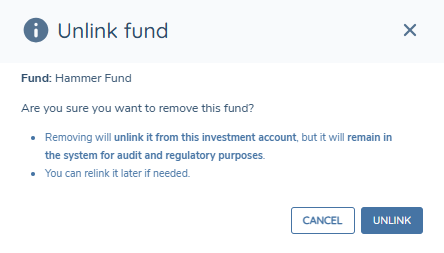
-
Select UNLINK to confirm.
The Fund is no longer displayed as linked to the Investment Account. The Fund record itself remains unchanged within Fenergo.
Offboarded and Pending Offboarding Funds
When linking a Fund to an Investment Account, Funds with status Offboarded are not returned in the Fund search results and cannot be selected. If a user still attempts to link an Offboarded Fund by submitting an ID directly (for example via a URL parameter or by pasting the Fund ID), the system rejects the request and prevents the link from being saved, displaying the message: “The selected Fund cannot be linked as it is offboarded or pending offboarding.” Funds with status Pending Offboarding are returned in search results and may be selected and linked as normal.
If an Investment Account is already linked to a Fund that has since become Offboarded, the existing link is not changed. When viewing the Investment Account task (Draft or Verified), the system displays a warning message above the Fund grid to inform the user that the linked Fund has been offboarded.
Linking a Bank Account to the Investment Account
The Investment Account task allows for bank accounts created via the Bank Account task to be linked to an investment account.
To link a bank account to an investment account, follow the steps below.
-
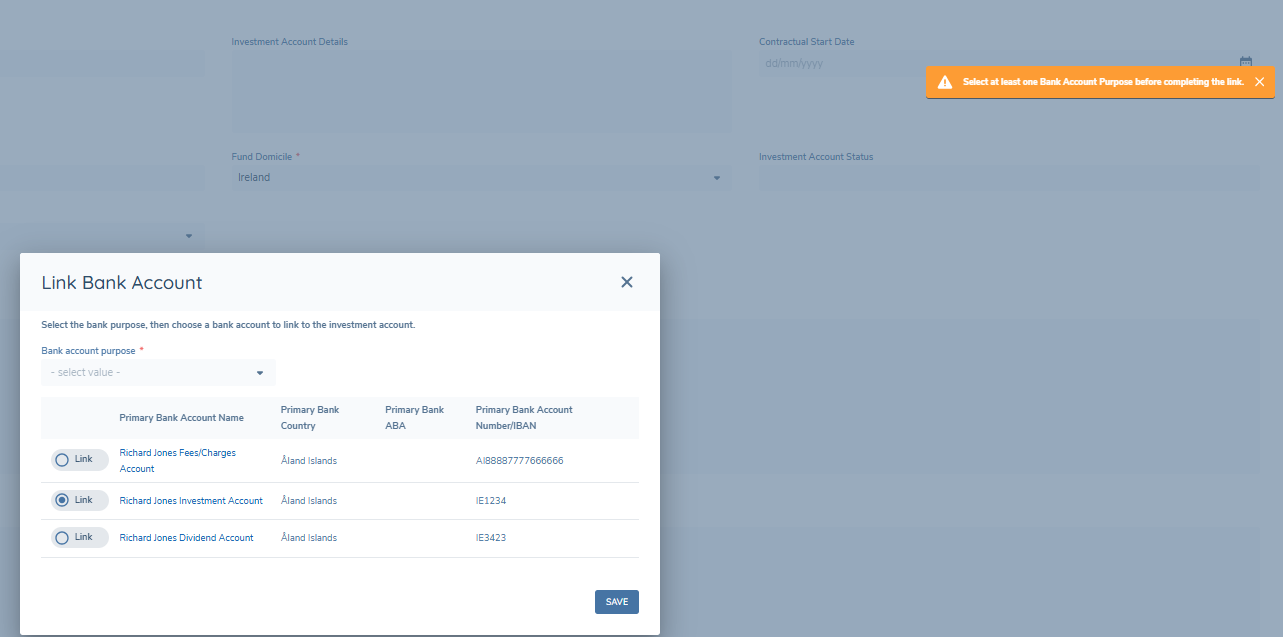
Select the Link Bank Account button displayed in the Bank Account Grid. This will display the Link Bank Account window as below with the bank accounts created for the entity listed in the table.
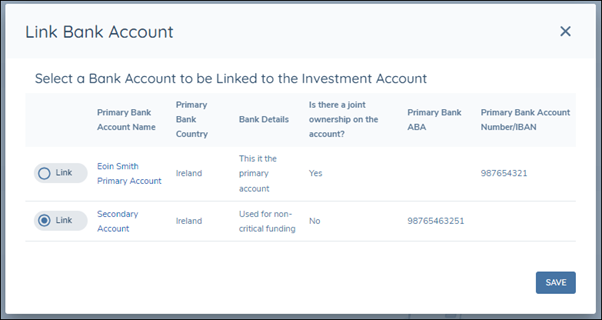
-
Select Link action for the applicable bank account and select SAVE.
The bank account will then be linked to the investment account. Multiple bank accounts may be linked to an investment account and to link additional bank accounts select the Link Bank Account button above the grid. This will open the Link Bank Account window and any bank accounts already linked will not be listed.
The Bank Account grid will only be displayed if it is enabled in the task configuration.
Bank account purpose when linking a Bank Account
If 'Enable bank account purpose' toggle is enabled for the Investment Account task, a Bank account purpose field is displayed in the Link Bank Account modal. Select one or more purposes before selecting SAVE to link the Bank Account. If 'Enable bank account purpose' toggle is not enabled, the Bank account purpose field is not displayed and users can link a Bank Account without selecting a purpose.
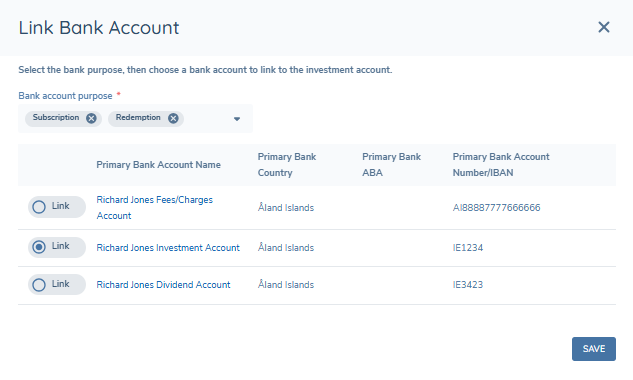
If no bank account purpose is selected, the system prevents linking and displays a message advising you to select at least one purpose.
Once linked, the selected purpose values are displayed in the Account Purpose column in the Bank Accounts grid.

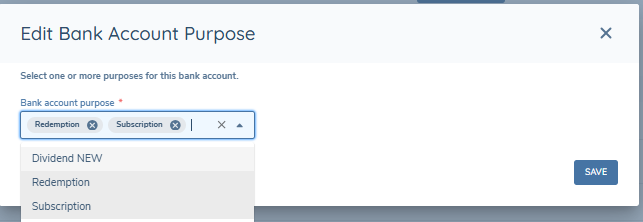
To update the purpose(s) for an existing link, select the pencil icon on the relevant row in the Bank Accounts grid. This opens the Edit Bank Account Purpose modal, where you can add or remove purposes and select SAVE to confirm. The pencil icon is only available when the Enable bank account purpose toggle is on.
If the Enable bank account purpose toggle is subsequently turned off, the Bank account purpose field is not displayed for new links and no validation is applied. Any previously captured purpose values remain visible as read-only in the Account Purpose column and are not removed.
Unlinking a Bank Account from the Investment Account
To remove an existing Bank Account relationship from an Investment Account:
-
In the Investment Account task, navigate to the Bank Accounts grid.
-
Hover over the relevant Bank Account row to display the Unlink icon.

-
Select the Unlink icon.
-
In the confirmation modal, review the Bank Account details shown.
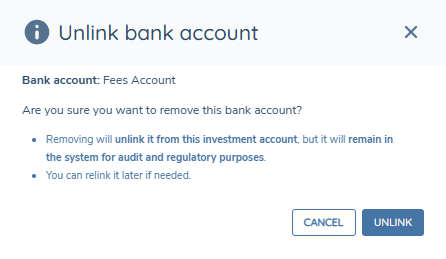
-
Select UNLINK to confirm.

The Bank Account is removed from the Bank Accounts grid and is no longer linked to the Investment Account. The Bank Account record itself remains unchanged within Fenergo.
Bank Account relationships can be unlinked using this action even where the relationship is verified.
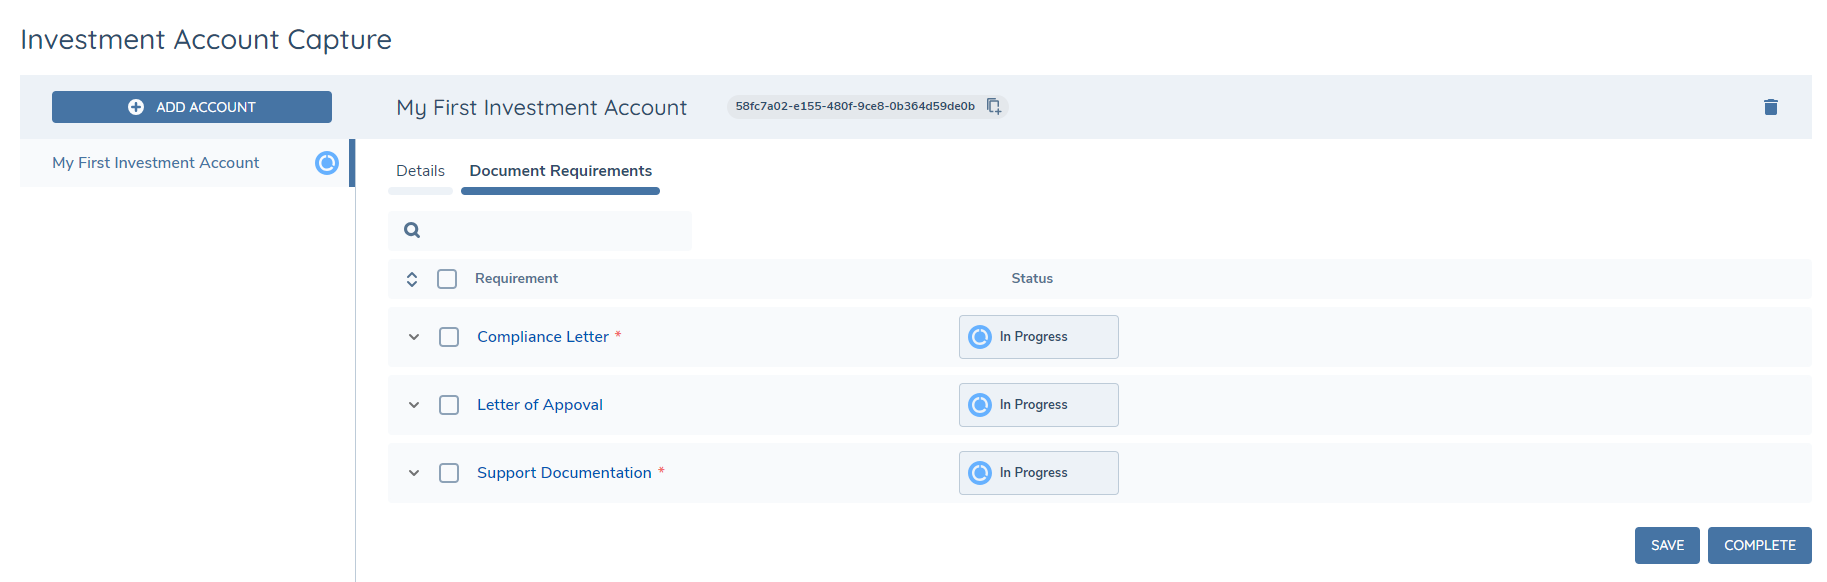
Document Requirements
In fulfilling an investment account, users may need to capture specific documents. The required documents, for an investment account, are listed under the document requirements tab in the investment account task.
The Document Requirements tab and table are displayed in the image below.

The Requirements Grid will display the document requirements that are in scope for the task, based on the categories, set against the task in the Journey Schema configuration and the corresponding document requirements configured in the Global Policy. Document requirements are listed on the grid in alphabetical order by default and mandatory document requirements are indicated with a red asterisk following the requirement name. From the Requirements Grid a user has the ability to complete the following actions:
- Upload one or more documents directly against a specific document requirement.
- Defer the requirement i.e. indicate in the system that the document cannot be collected at that time, but it will be available on a future date.
- Waive the requirement i.e. indicate that this document will never be collected.
Documents linked to a requirement are presented in the form of chips with the friendly name of the document displayed as a label.
Each document requirement listed in the table may be expanded by clicking on the arrow to the left of the requirement. When expanded the following tabs are available as shown in the image below.
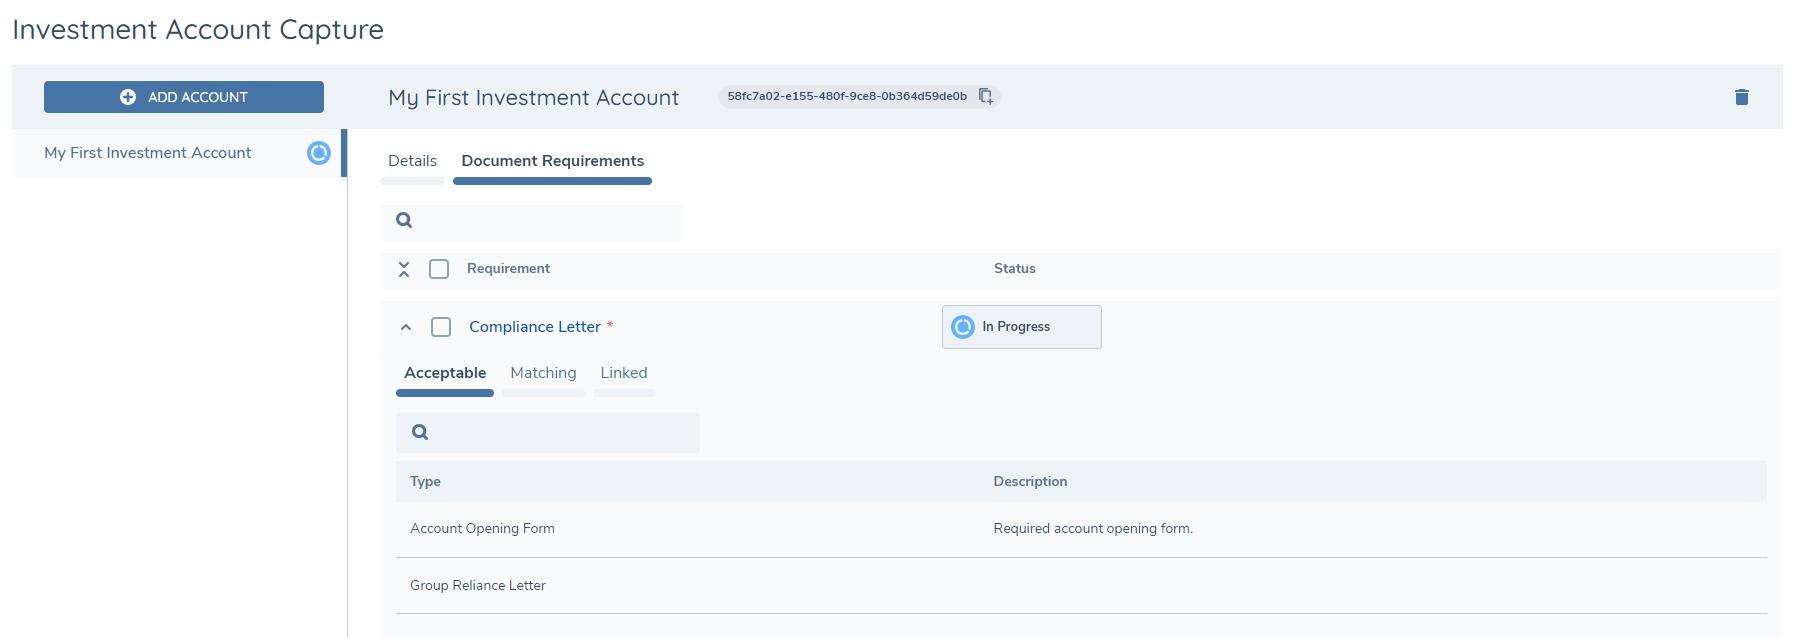
- The Acceptable Tab presents the document types which have been configured as acceptable for the requirement in Policy, along with the description of the document which is configured in the set of Document Types.
- The Matching Tab presents a grid of existing documents which are already linked to the entity (e.g. in previous journeys or the current journey) AND of a type which is acceptable for the current document requirement.
- The Linked tab presents a grid displaying some additional details about the documents which are linked to the requirement and allows a user to perform simple actions such as unlinking or editing the metadata for these linked documents, either individually or in bulk.
The Matching Tab will surface Investor Entity documents that match the acceptable document type configured against the document requirement.
Uploading Documents
To upload a document, drag and drop the document(s) over the row of the requirement or by clicking on the upload icon that appears when you hover over a document requirement in the grid. This will then open the document upload modal. For additional information on uploading documents and fulling requirements please refer to the Document Management v2 User Guide.
Investment Account Related Parties
The Investment Account provides the ability to manage the relationship between and Investor and Fund. However, there can also be other parties involved in this relationship and allowing the capture and management of those Related Parties, via the Investment Account task, provides a deeper understanding and effective management of Investment Accounts.
Related Parties for an Investment Account, along with their relationship, are captured via the Related Parties grid within the Investment Account task. The Investment Account must be in edit mode (i.e. a draft must have been created in the context of the journey) in order to interact with the grid.

Adding Related Parties
To add a related party to an investment account comeplte the following:
-
In the Investment Account task, select either Link Related Parties or Add Related Parties button above the Related Parties grid.
-
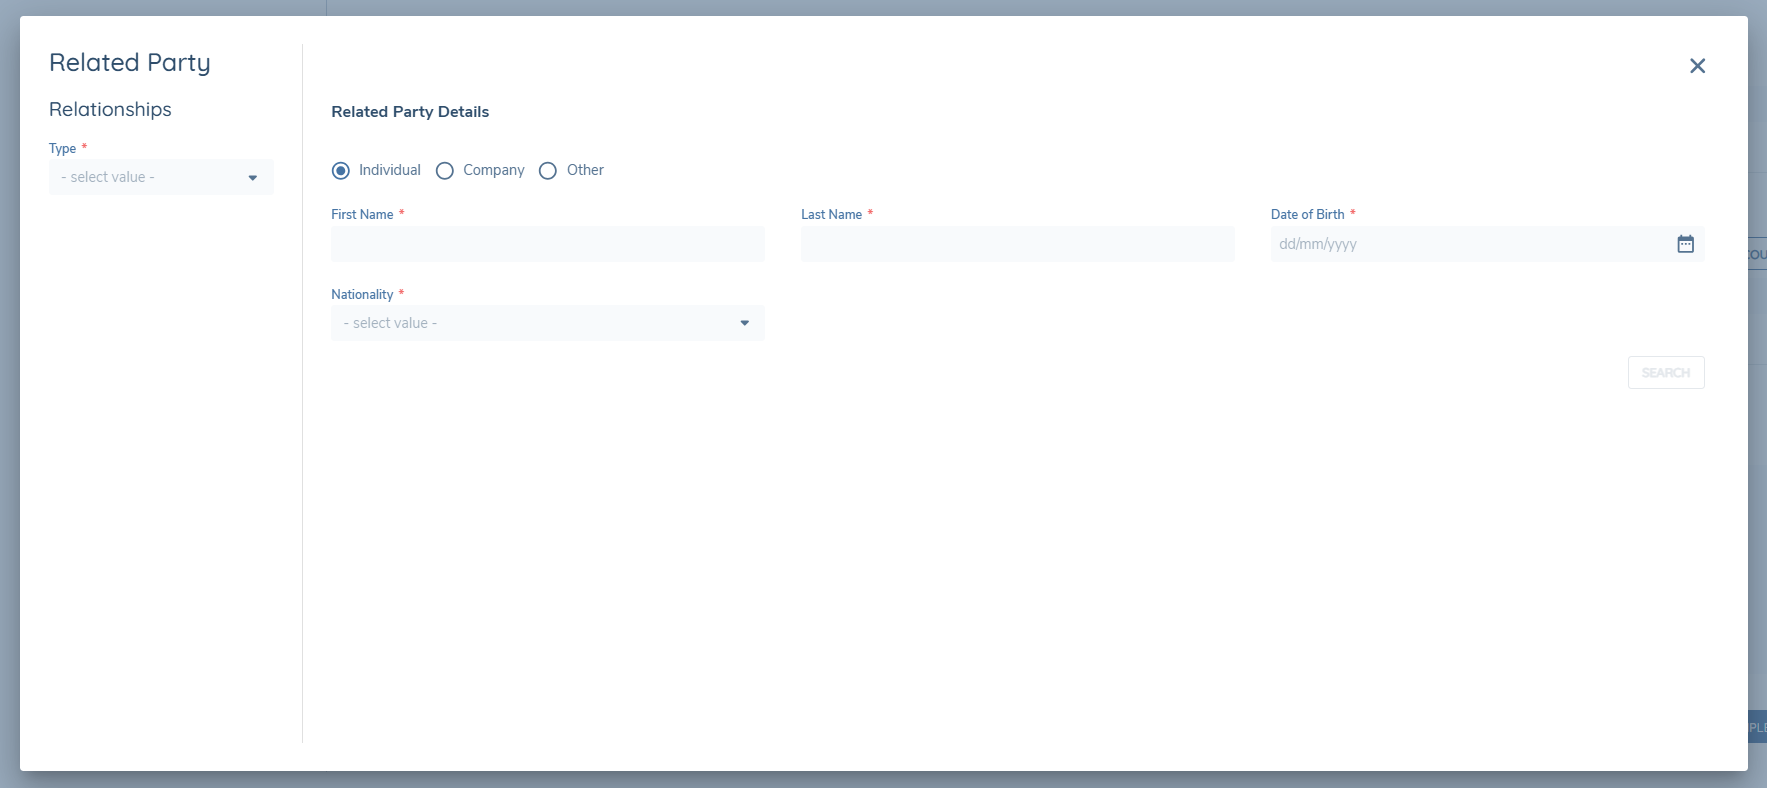
The Related Party modal opens. This modal contains two panels:
- Related Party Basic Details – used to search for an existing entity and capture basic details for the entity.
- Relationship Details – used to capture the nature of the relationship between the investment account and the related party.
-
In the Related Party Basic Details panel, enter information into one or more search fields.
- A search can only be performed when at least one field is populated.
- The search fields displayed are determined by the Related Party Basic Details policy category.
-
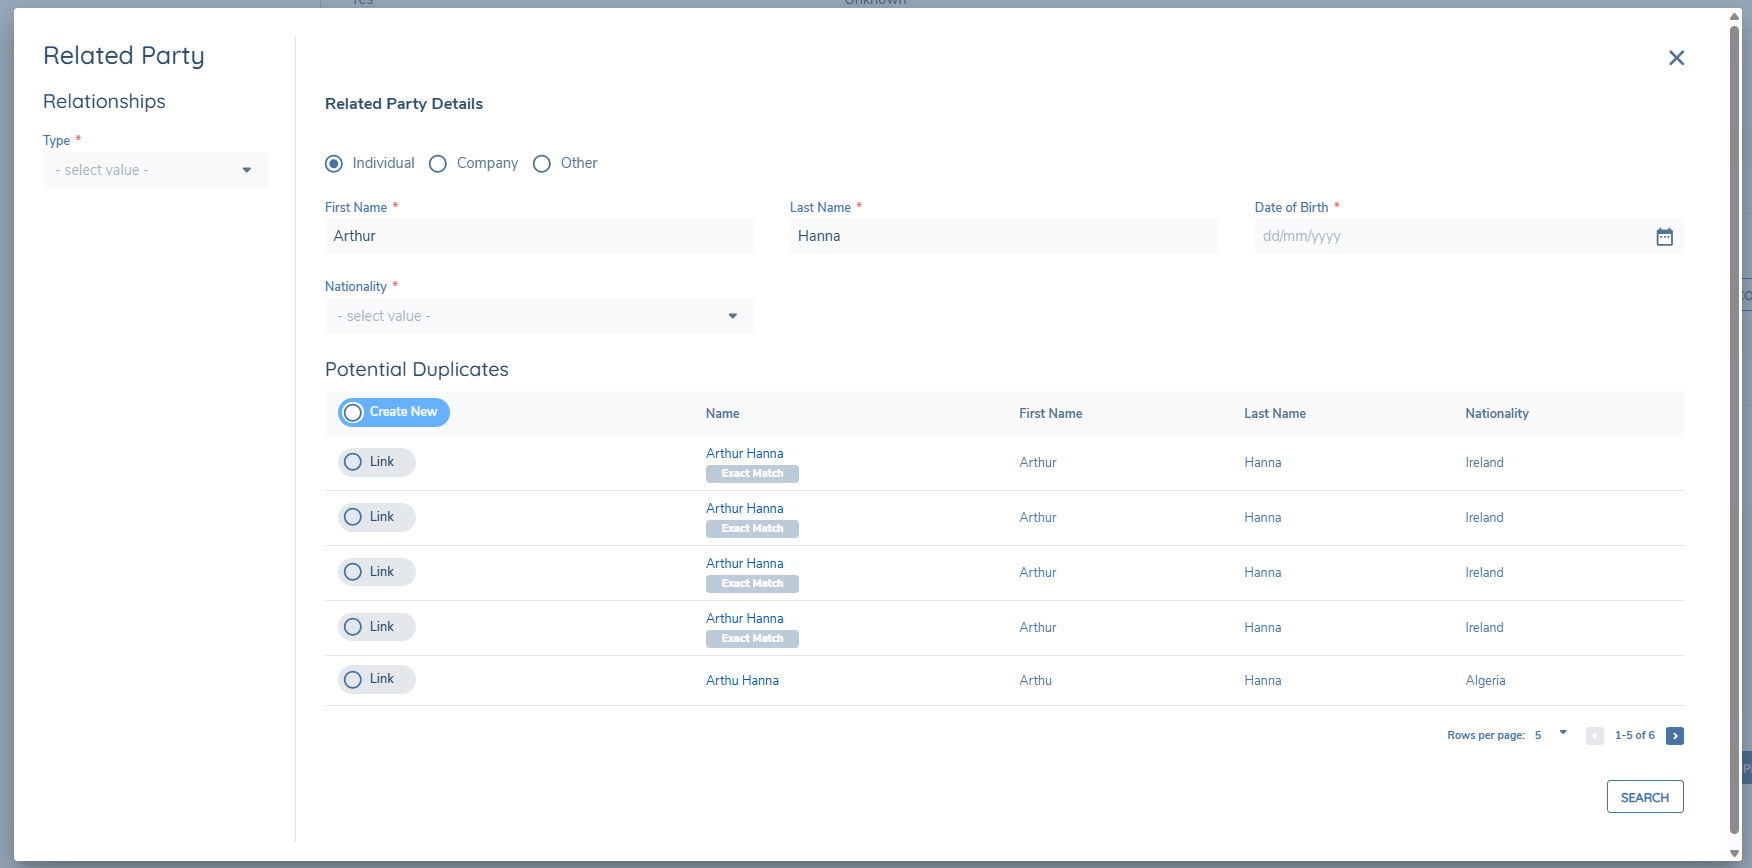
Select Search to perform a duplicate check.
- The system performs a search based on the details entered and displays matching entities within the same modal.
-
If no fields are populated when Search is selected, an inline message appears advising that at least one field must be populated before searching.
-
Review the search results displayed. Each record represents an existing entity within the system that matches the entered search criteria.
Linking an Existing Entity
If the required entity already exists within Fenergo:
- Select the matching entity from the search results list.
- Click Link to associate the entity with the investment account.
- The modal updates to display the selected entity’s details.
- Complete any required fields relating to the relationship.
- Select Save to confirm.
The relationship between the investment account and the selected entity is created once the record is saved.
If any mandatory fields are missing, the system highlights these fields and prevents saving until they are completed.
Creating a New Entity
If the required related party does not exist within Fenergo:
- From the search results view, select Create New.
- Complete all mandatory fields in the Related Party Basic Details and Relationship Details panels.
- Select Save.
On save, the system creates the new entity and establishes the relationship between that entity and the investment account.
Editing a Related Party
To edit the details of a related party already linked to an investment account:
- In the Related Parties grid, select the Edit (pencil) icon beside the relevant record.
- The Related Party modal opens pre-populated with the current details.
- Modify any applicable entity or relationship fields as required.
- Select Save to confirm changes.
The updated details will be displayed in the Related Parties grid.
Unlinking a Related Party
To remove an existing relationship:
-
In the Related Parties grid, select the Unlink icon beside the relevant record.

-
Confirm the unlink when prompted.
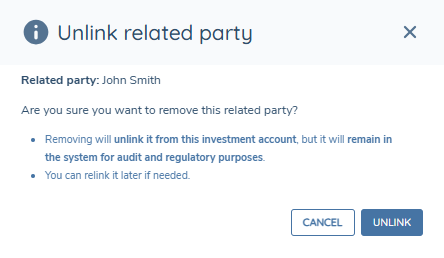
This action removes the association between the entity and the investment account. The related entity record itself remains unchanged within Fenergo.

Related Parties Grid
Once a related party has been added or linked, it is displayed within the Related Parties grid of the Investment Account task.
The grid displays the following columns:
- Name – The name of the related entity.
- Type – The entity type (e.g. Individual, Company).
- Relationship – The relationship captured between the investment account and the related party.
Each row includes icons for editing and unlinking the relationship.
Notes
- Related parties captured in the Investment Account task are specific to that investment account.
- This functionality does not include identification and verification (ID&V) activities.
- Relationships captured here do not impact or trigger any global related party verification tasks.
Verification and Deletion
Following completion of the Verify Account Relationships task in a journey, Investment Accounts and Bank Accounts captured or edited in the journey, and their associations, are verified.
Relationship removal from an Investment Account is performed using Unlink. Unlink removes the association to the Investment Account and does not delete the underlying record.
After verification:
- Bank Accounts: Bank Account relationships can be unlinked from an Investment Account using the Unlink action, including where the relationship is verified.
- Funds and Products (Share Classes): Only one Fund can be linked to an Investment Account. The Unlink action for a Fund is only available before verification where the Unlink icon is shown in the UI. After verification, the Unlink icon is not shown for the Fund relationship, so the linked Fund cannot be removed via the Investment Account task. If a Product (Share Class) is linked, the Product link cannot be removed or edited after verification.
If you need to permanently remove a Bank Account record from an Entity (and from all linked Investment Accounts), use the Delete Verified Bank Accounts from an Entity capability in the Bank Account Associations & Deletion section. This is separate from unlinking a relationship in the Investment Account task.
Currently there is no snapshotting of either the Bank or Investment Account task in a journey. Therefore, when returning to a completed task, all verified records for an entity will be shown with the most recent data.
Screening of Investment Accounts and its Related Parties
The Investment Account task provides the ability to capture related parties for an investment account. The related parties may be existing or new entities created directly from the investment account task itself. To ensure compliance and to meet required due diligence standards it may be necessary to screen the related parties, of the investment account, in the same manner as those captured via the Related Party task. To facilitate the screening of investment account related parties, screening scoping has been extended to include an entities investment accounts and their related parties. Funds and bank accounts directly linked to an investment account, through the specific grids from the investment account task, are excluded. However, if they are linked as a related party, they will be included dependent on the relationship captured and scoping rules. Investment accounts and their RPs are treated in the same manner as any other entity that is included in screening.
For further information on screening please refer to the dedicated screening user guide.
Related Party Investment Accounts
- If the related party of the investment account itself has related parties, these entities will be included in the screening scope.
- Investment accounts of the related party will not be included in screening. Only the investment accounts of the entity for which the journey is in progress are included.
- If an investment account is related to an entity or to another investment account as a related party, then not only will those investment accounts be included in screening but also the investment accounts related parties.
Screening Scoping
- If the desireded outcome is for investment account themselves to be excluded from screening, a screening scoping rule may be configured to facilitate this.
Offboarded Investment Accounts - Scoping
- If an investment account is pending offboarding or offboarded it will be excluded from screening scoping and will be automatically excluded from the Screening Entity Selection task and the Initiate Screening request.
- When ongoing screening is used it is recommended that following the offboarding of investment accounts the unsubscribe from ongoing screening task be actioned, in the journey, so that the investment accounts and their related parties may be unsubscribed if needed.
- When an investment account has been offboarded, a journey should not be launched against it. If a journey is launched against an offboarded investment account it will lose the offboarded chip.
Unsubscribe from Ongoing Screening
- Offboarded investment accounts and their related parties will be automatically excluded from screening scoping. However, they will continue to be included in ongoing screening until they are unsubscribed.
Investment Account Offboarding
Investment accounts follow a lifecycle and once they reach their end of life a control is needed to both action and reflect this. Therefore, in the investment account task, those investment accounts that have been previously verified, will have an Offboard button available, as indicated in the screenshot below.
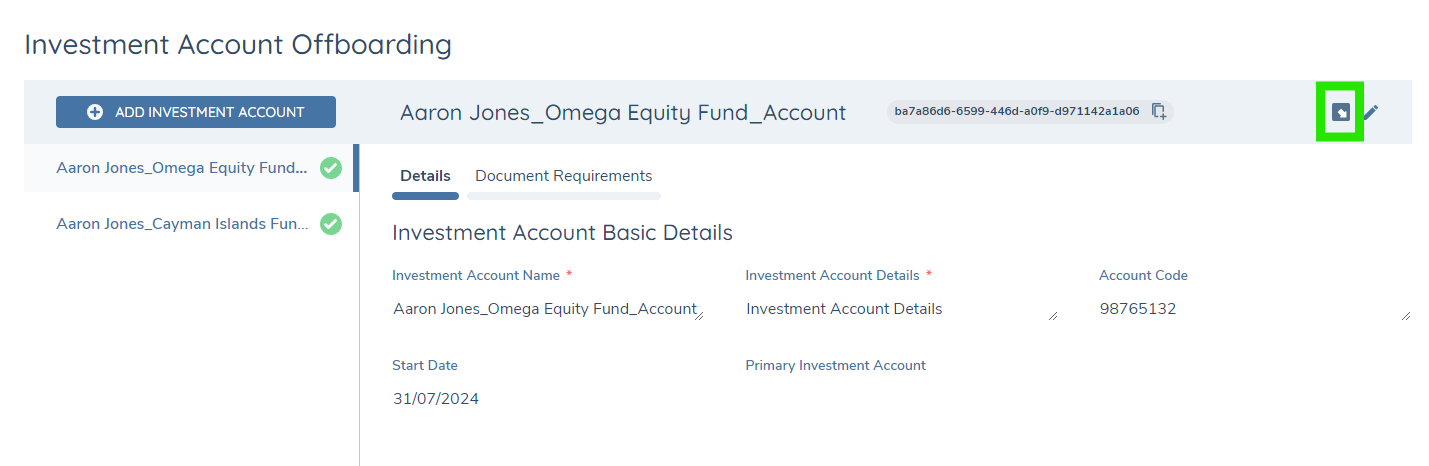
When the Offboard button is selected, a draft version of the investment account will be created, which the user can then edit, and the investment account will be displayed in the task with a chip of Pending Offboarding.
If the Offboard button is selected in error, a Revert button is available to clear the Pending Offboarding. Revert does not delete the draft record created.
Note: The Offboarding button is displayed dependent on the task configuration and only if the investment account has been previously verified.
Re-evaluation at Verified Offboarding
The Evaluate Investment Account at Verified Offboarding system parameter controls when an Investment Account that is Pending Offboarding is removed from entity evaluation. This parameter is tenant-wide, is disabled by default, and is managed on the Account Control Configuration page. See Account Control Configuration for the configuration.
Parameter disabled (default)
When the parameter is disabled, existing behaviour is preserved: an Investment Account is immediately excluded from entity evaluation as soon as it is marked as Pending Offboarding, and IA-driven policies, documents, data requirements, and Dynamic Access Layers are removed at that point.
Parameter enabled
When the parameter is enabled, an Investment Account that is Pending Offboarding remains in entity evaluation and continues to drive policies, documents, data requirements, and Dynamic Access Layers, based on policy configuration.
The Investment Account is only removed from entity evaluation when the Verify Account Relationships task completes in the journey. The related requirements are re-evaluated at that point.
Client Offboarding
During a full client offboarding, for the global jurisdiction, all investment accounts created for the client will automatically be flagged as pending offboarding. On completion of the offboarding journey all investment accounts will be offboarded.
Offboarded Investment Accounts
Having completed the journey, in which the offboarding was actioned, a ‘Client Offboarded’ chip will be displayed on the profile page of the investment account. Additionally, as in the screenshot below, an offboarded chip will be displayed against the investment account in the investment account tab views.
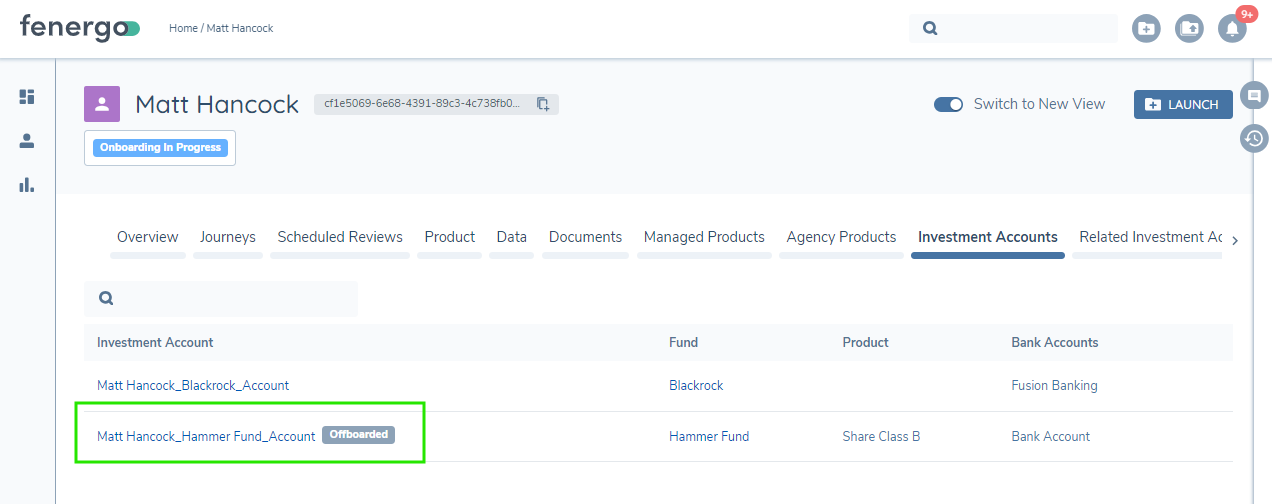
Offboarded investment accounts are not displayed in the investment account task.
Screening
Investment accounts that are Pending Offboarding or Offboarded are automatically excluded from screening scoping.
However, if an investment account or its related parties have been subscribed to ongoing screening, they will continue to appear in the unsubscribe from ongoing screening task. This is to allow for the un-subscription at the required time.
Scoping Conditions
Investment accounts that are Pending Offboarding or Offboarded are automatically excluded from scoping conditions. This is to ensure that the those investment accounts are no longer included in the evaluation of requirements on the entity, for which the investment account was created.
Data Deletion
Having completed the offboarding of an investment account, similar, to the client offboarding process, the system records the data retention period for the jurisdictions that were offboarded. This brings the investment account in scope for data deletion for the corresponding jurisdictions.
Whether offboarding the investment account via the investment account task or automatically through the offboarding of the investor record, the data captured on the investment account is governed by the global policy. Therefore, the data retention period will be set based on the retention period configured for the global jurisdiction.
For additional information on Data Deletion please refer to the dedicated Data Deletion guide.
Configuring Investment Account Management
The following covers the required and available configuration options need to implement both the investment and bank account tasks.
Investment Account Task Configuration
In Journey Builder a task of type Investment Account is available that allows the capture and maintenance of investment accounts for an entity.
To configure the Investment Account task in a journey, follow the steps below.
- In a draft journey scheme select the task that the Investment Account task will proceed or follow.
- Select the applicable Add Task option (i.e. Add task after or before)
- In task properties select the task type of Investment Account.
Having added the task there are several configuration options to be set on the Investment
Account task as detailed below.
- Fund Search: The category selected will determine the fields to be displayed in the fund search window. Fields must be indexable to be displayed. By allowing for the specification of the category it enables the customisation of the data points in policy to be tailored to the required search criteria. The fund search utilises the same search logic as applied on the de-duplication search, when initiating a new entity request. For additional details on search please refer to the Enhanced Search document.
- Initial Creation Categories: The categories configured/selected will be displayed to the user when first adding an investment account. It is recommended that the categories configured are limited to deliver a better user experience.
- Link Product: When enabled users will be directed to link a product of the fund to the investment account. Only a single product of a fund may be linked to an investment account and will be displayed as an expandable table under the fund.
- Link Bank Account: When enabled a user will be able to link bank accounts to an investment account if they have been captured against the entity for which the investment has been created.
- Enable bank account purpose: When enabled on the task, users must select a bank account purpose when linking a bank account to an investment account.
Enforce Investment Account Creation
To enforce the capture of at least one investment account in the Investment Account task, enable the 'Enforce investment account creation' toggle in task properties. When this toggle is enabled, if the user attempts to complete the task and no investment accounts have been created against the entity, they will be presented with a validation error. At least one investment account must be created in order for the task to complete successfully.
An investment account created in the current journey or previously verified against the entity satisfies this requirement. The toggle defaults to Off for both existing and newly created journey versions, and its state is persisted per journey version.
Bank Account Task Configuration
In Journey Builder a task of type Bank Account is available that allows the capture and maintenance of bank accounts for an entity.
To configure the Bank Account task in a draft journey, follow the steps below.
- In a draft journey scheme select the task which the bank account task will proceed or follow.
- Select the applicable Add Task option (i.e. Add task after or before)
- In task properties select the task type of Bank Account.
This will add the Bank Account task to the journey. Capture the task properties as required and select the applicable policy categories that are to be displayed to the user when capturing or maintaining the bank account as part of a journey.
Bank Account Basic Details Category
The Bank Account Basic Details category drives the fields that will be displayed in the bank account table to a user. This is applicable in both the Bank and Investment Account tasks.
Therefore, this category must be used when capturing the bank account. It is recommended that this category be used throughout a journey when interacting with bank accounts.
Enforce Bank Account Creation
To enforce the capture of at least one bank account in the bank account task, enable the 'Enforce bank account creation' toggle in task properties. When this toggle is enabled, if the user attempts to complete the task and there are no bank accounts captured against the entity, they will be presented with a validation error. At least one bank account must be captured in order for the task to complete successfully.
Verification
Bank and investment accounts captured or edited in a journey, and their relationships to an entity will be verified by the Verify Entity and the Verify Account Relationships tasks.
- Verify Entity: This will verify the entity data.
- Verify Account Relationships: This will verify the relationship between the accounts and an entity.
User Permissions
A user must have the following permissions to access and edit bank or investment accounts via the tasks.
- Association Access
- Association Edit
- Entity Data Access & Search
- Entity Data Edit
- Policy Search and Requirement Scope
Policy and Data Requirement Configuration
For both investment and bank accounts the data fields / requirements that are displayed must be configured in the global policy. Data requirements must have an Entity Type of Other and Target Entity of Related Party.
The Rich Text Editor field type is not supported by the tasks and if configured will not be displayed.
Fields displayed can be configured with trigger conditions using the entity data of the bank or investment account itself. This is configured by setting the 'Source' in the trigger condition to be "Current Entity".
If looking to use the search for either investment or bank accounts, then data requirement must be indexed.
Data Field (legalEntityName)
For both bank and investment accounts a field with the data base field name of legalEntityName must be configured and available to the user when adding a record. The field name displayed to the user may be configured as needed.
Bank account purpose
The selectable purpose values are configurable via the Reference Editor under the Bank Account Purposes reference data list. The Enable bank account purpose toggle on the Investment Account task controls whether the Bank account purpose field is displayed and enforced when linking a bank account. Refer to the Investment Account Task Configuration section for toggle details.
Fund Search Category Configuration
The Fund Search Category as configured for the Investment Account task is used to determine the fields to be displayed in the fund search window. For a field to be displayed in this window it must be configured as in the Global Policy and with an entity type of Company and Target Entity of Related Party.
It is not the intention that the fields in this category are used to capture data but rather allow for the specific configuration of the fields as to be used in the search.
Related Party Category Configuration
The data fields that appear in the add/edit Related Party modal are configured in Policy. Aligning to the Related Parties task, Data Requirements must be configured with a Target Entity of "Related Party" and a Policy Category of either “Relationship Details” or “Related Party Basic Details” in order to appear in the modal in the Related Parties task.
The Policy Category field determines which panel of the modal the field will appear in.
1. Related Party Basic Details Fields with this category appear in the top panel of the modal and are used to capture the minimum data required in order to perform a duplicate search and also create an entity record for the related party. This data is stored against the entity itself.
2. Relationship Details Fields with this category appear in the right hand panel, of the window, and are used to capture any metadata specific to the association(s) rather than the entity. These fields will be stored as properties of the association.
Requirements presented in the panels of the Related Party modal can be configured with trigger conditions using the entity data of the related party itself via the "Current Entity" source. In addition the source of "Related Client" may be used to trigger requirements. However the Related Client in this instance is the Investment Account.
Document Requirement Configuration
In fulfilling an investment account, users may need to capture specific supporting documents. The required documents, for an investment account, are displayed via the document requirements tab in the investment account task as displayed in the image below.
Investment Account document requirements must be configured in the global policy, have an Entity Type of Other and Target Entity of Related Party.
Requirements may be configured with trigger conditions using either the entity data of the investment account or of the entity for which it was created.
To configure a rule using the account data the ‘Source’ must be set to "Current Entity whereas to trigger a rule using the data of the entity, from which the account is created, the ‘Source’ must be set to "Related Client”.
Account Related Funds
The fund linked to an investment account may have material impact on the investor record. For example, a domestic fund based in the United States compared to an offshore fund based in the Cayman Islands will affect both tax and regulatory obligations.
Therefore, to provide a seamless user experience, where requirements can be driven on the investor by the investment account related fund, a new source has been added of Account Related Funds.
This source may be used in trigger requirements directly, against the investor record, for the items as listed below and to set conditional values on data requirements.
- Data Requirement
- Document Requirement
- Ownership and Control Requirement
The source of Account Related Funds cannot be used to trigger requirements directly on the investment account. It can only be used to trigger requirements on the root entity for which the investment account was created. To address this scenario, configure a field on the root entity that is set based on the value of the account related fund. This field can then be used to drive a requirement on the investment account.
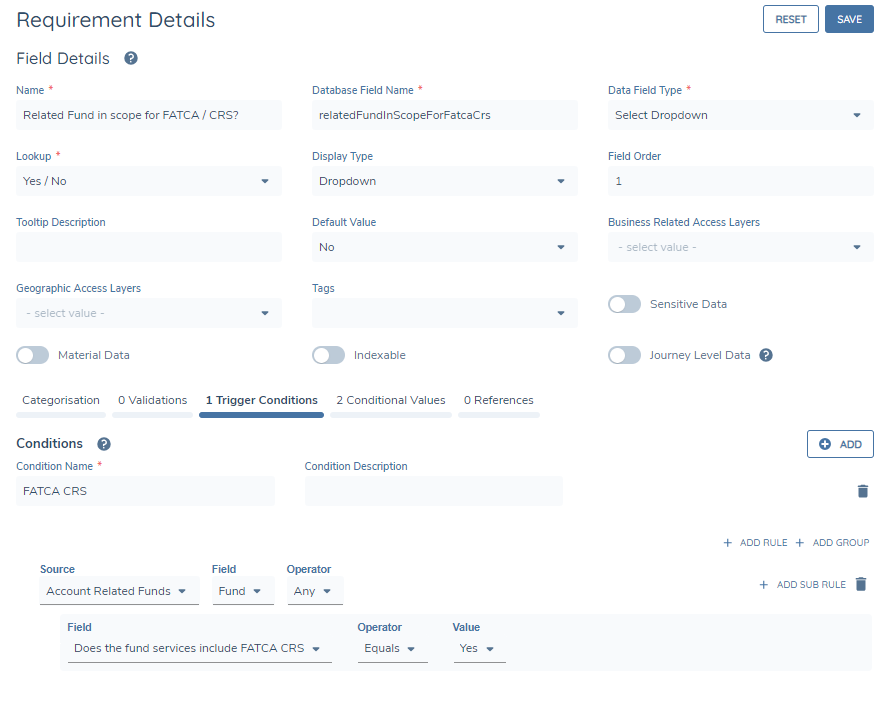
Configuring Account Related Fund Conditions
The following details the steps required to configure a field triggered by the account fund, which is then used to trigger a policy on the investor. In this scenario, it checks if any of the related funds are in scope for FATCA or CRS, and if so, drives the applicable policy on the investor.
-
In a draft data requirement, select Trigger Conditions from the tabs and select ADD
-
Capture the mandatory condition name
-
From the source select Account Related Funds and select the operator as Any
-
From the field dropdown select the applicable value that is captured on the Fund (i.e. the entity linked to the investment account) and set it to Equals Yes (i.e. to be displayed when the value is set to Yes).
Note: The above is only required if it is necessary for the user to see the value itself. It can simply be set in the background via step 5.
-
Select the Conditional Values tab and add two rules: one to automatically assign a value to the field when the condition is met, and the other for when it is not met. In the below, if any account related fund has a country of incorporation of United States and the Fund Service is in scope for FATCA / CRS the value of the field is automatically to be set to Yes.

-
Having defined the above the final configuration step is to configure the applicable policy scoping condition, which in this scenario is configured as in the screenshot below.
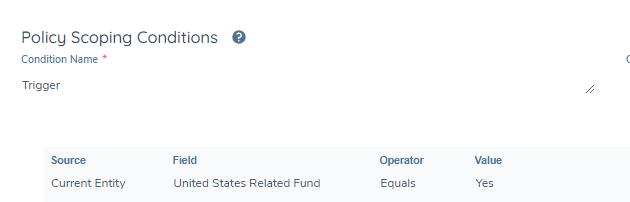
This is simply using the field, as defined above, to trigger the policy when the field value is Yes.
Evaluation of Account Related Fund Conditions
When adding or removing a related fund from an investment account, Fenergo will evaluate all configured requirements for the entity that the investment account has been created. Following the example above, if a linked fund meets the conditions, the Related Fund field will automatically be set to "Yes," thereby bringing the policy within the scope of the entity.
Account Control Configuration
The Account Control Configuration page, available under Management → Journey, is a dedicated, permission-governed configuration area for tenant-wide settings that affect investment account behaviour. It provides a single location for managing account-related system behaviour consistently, with access and edit permissions controlled explicitly, and settings persisted across the tenant.
Accessing Account Control Configuration
The Account Control Configuration option is displayed in the Management menu only when the user has the Account Control Configuration Access permission. When visible, it appears under the Journey heading, at the bottom of the list. Selecting Account Control Configuration opens the configuration page.

Required Permissions
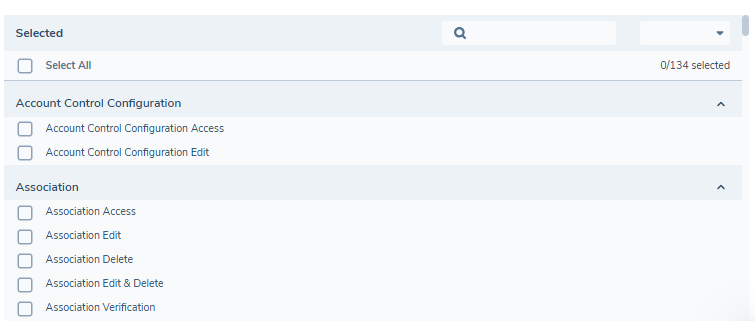
Two permissions govern access to Account Control Configuration:
- Account Control Configuration Access — view the Account Control Configuration page and all settings.
- Account Control Configuration Edit — modify and save Account Control Configuration settings.
Account Control Configuration Edit requires Account Control Configuration Access — a user cannot be assigned Edit without also having Configuration Access. Both permissions are assignable to a Team via Security Configuration (Management → Security → Security Configuration → select a Team → Permissions).
Viewing and Editing Account Control Configuration
The behaviour of the Account Control Configuration page depends on the user's assigned permissions:
- Configuration Access only (no Edit): all settings are visible but read-only. The Save button is visible but disabled.
- Configuration Access and Edit: settings are editable. The Save button is enabled.
All changes made on the Account Control Configuration page persist tenant-wide on Save.
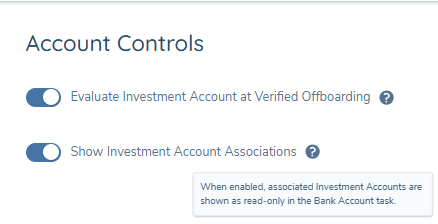
Evaluate Investment Account at Verified Offboarding
The Evaluate Investment Account at Verified Offboarding toggle controls whether Investment Accounts are re-evaluated at the point of Verified Offboarding. This setting is tenant-wide and is disabled by default.
When saved, updates to this setting persist tenant-wide and apply to all subsequent Verified Offboarding actions. See Re-evaluation at Verified Offboarding for the resulting runtime behaviour.
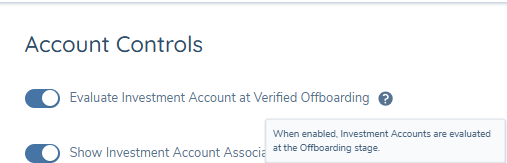
Show Investment Account Associations
The Show Investment Account Associations toggle controls whether Investment Account associations are displayed on the Bank Account task. See the Bank Account Associations & Deletion section for the downstream behaviour governed by this setting.
This setting was previously available under Entity Profile Configuration → Common Configuration and has been relocated to Account Control Configuration. Behaviour is unchanged and existing tenant values are preserved.