Managing Documents
The Documents Feature in Fenergo SaaS allows users to upload and manage documents relating to an Entity that they are onboarding / reviewing.
Document Types
The file types currently supported are:
- bmp (Bitmap Image)
- csv (Comma-separated values)
- doc (Microsoft Office document)
- docm (Microsoft Word Macro-enabled Document)
- docx (Microsoft Office Open XML Format (OOXML) Document)
- dot (Microsoft Word Document Template)
- eml (E-Mail Message)
- gif (Graphics Interchange Format 87a and 89a)
- htm (Hypertext markup language)
- html (Hypertext markup language)
- jfif (JPEG File Interchange Format)
- jpeg (JPEG Image)
- jpg (JPEG Image)
- log (Log File)
- mht (MHTML Web Archive)
- msg (Microsoft Outlook file)
- nsf (Lotus Notes Database Format)
- odt (OpenDocument Text Document)
- oft (Microsoft Outlook file template)
- pdf (Portable Document Format)
- png (Portable Network Graphic)
- ppt (PowerPoint presentation)
- pptx (Microsoft Office Open XML Format (OOXML) Document)
- rtf (Rich Text Format File)
- tif (Tagged Image File)
- tiff (Tagged Image File Format)
- txt (Text)
- xls (Excel spreadsheet)
- xlsm (Microsoft Excel Macro-Enabled Spreadsheet)
- xlsx (Microsoft Office Open XML Format (OOXML) Document)
- xltm (Microsoft Excel Macro-Enabled Spreadsheet Template)
- xml (Extensible Markup Language)
- xps (XML Paper Specification File)
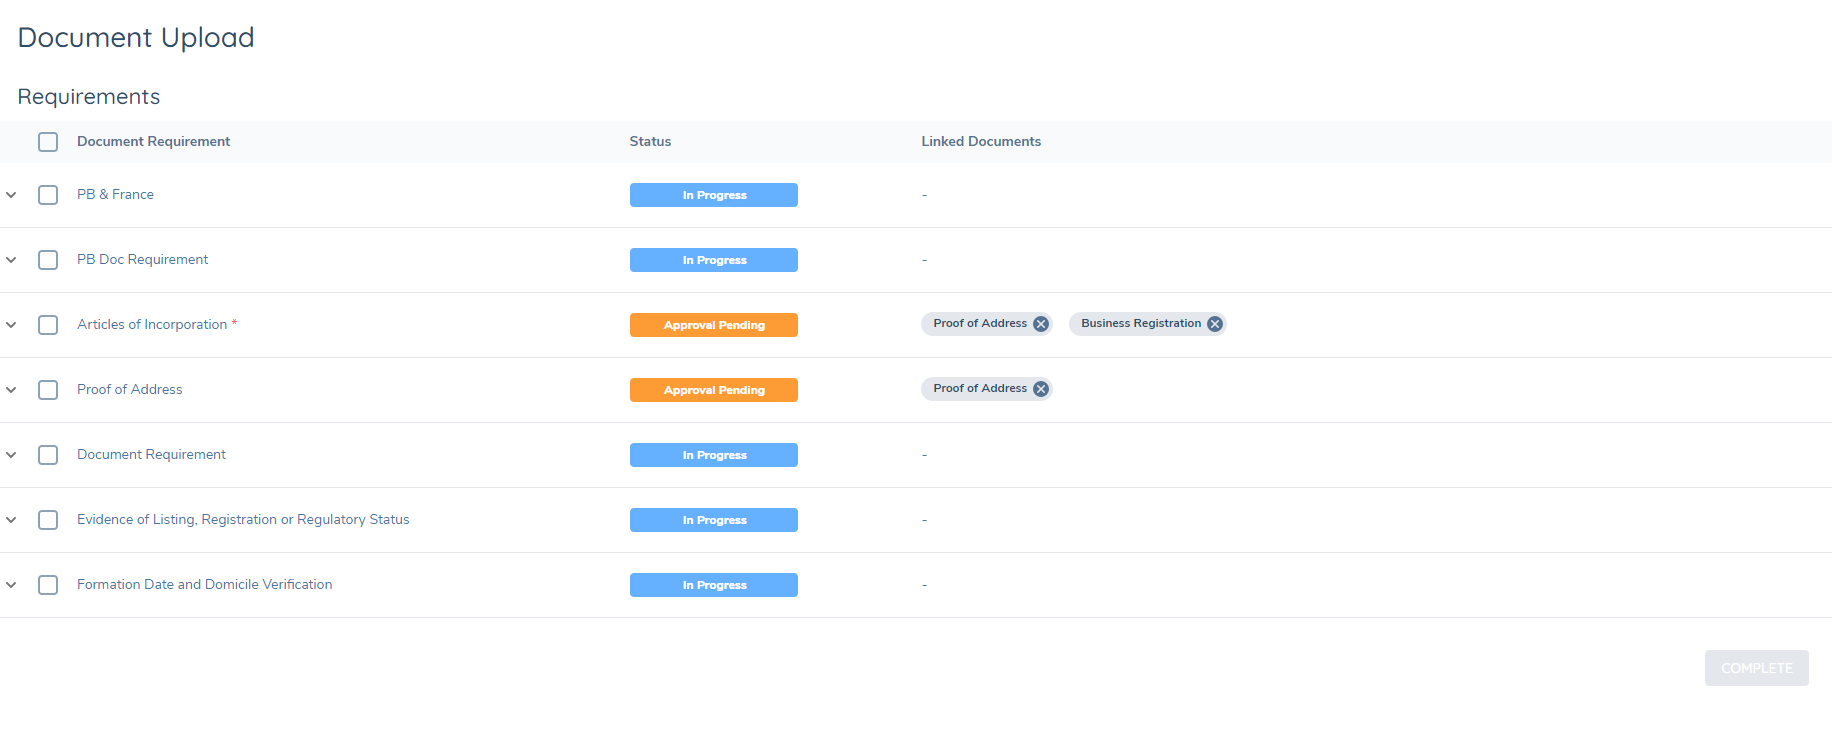
Uploading a document
Documents are uploaded against a requirement.
- One document can satisfy many requirements.
- Many documents can satisfy one requirement.
- Many documents can satisfy many requirements.
- A user can choose to not upload any documents against a requirement, and instead waive/defer the requirement.
Drag and Drop
Open your file explorer and drag and drop a document to the upload arrow on the right. You can drag and drop more than one document at a time.
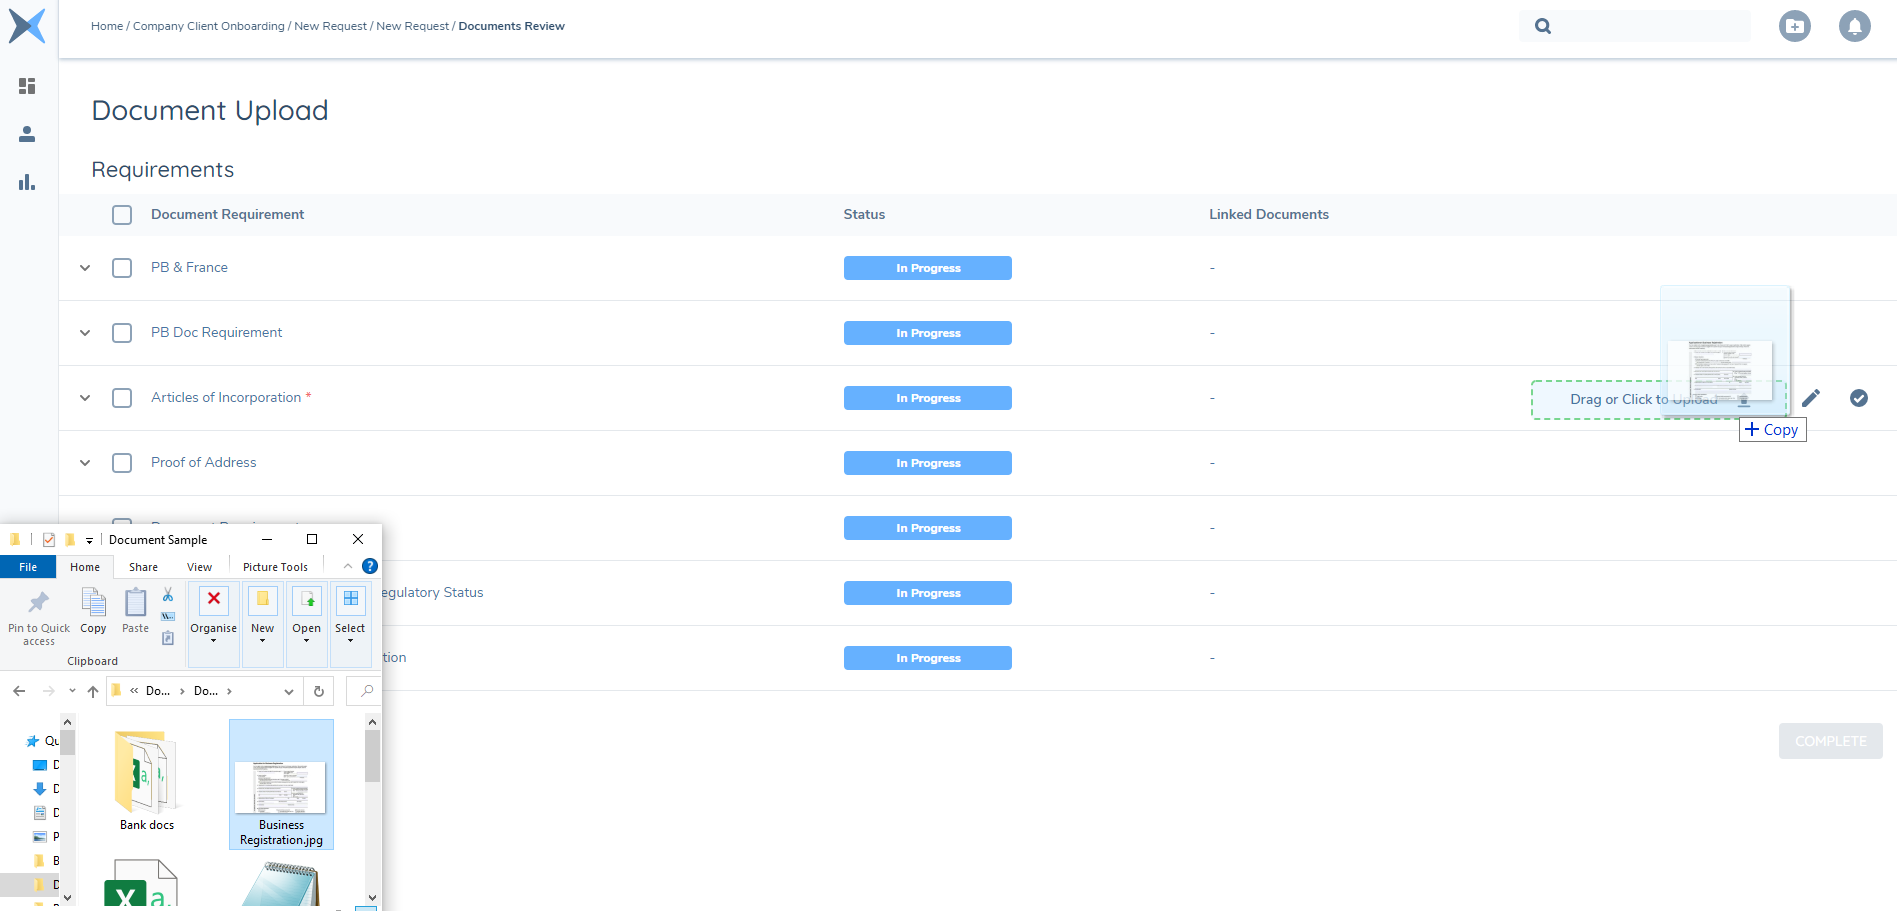
Upload via File Explorer
Hover over the document requirement and select click to upload to open your file explorer. Select the files to upload.
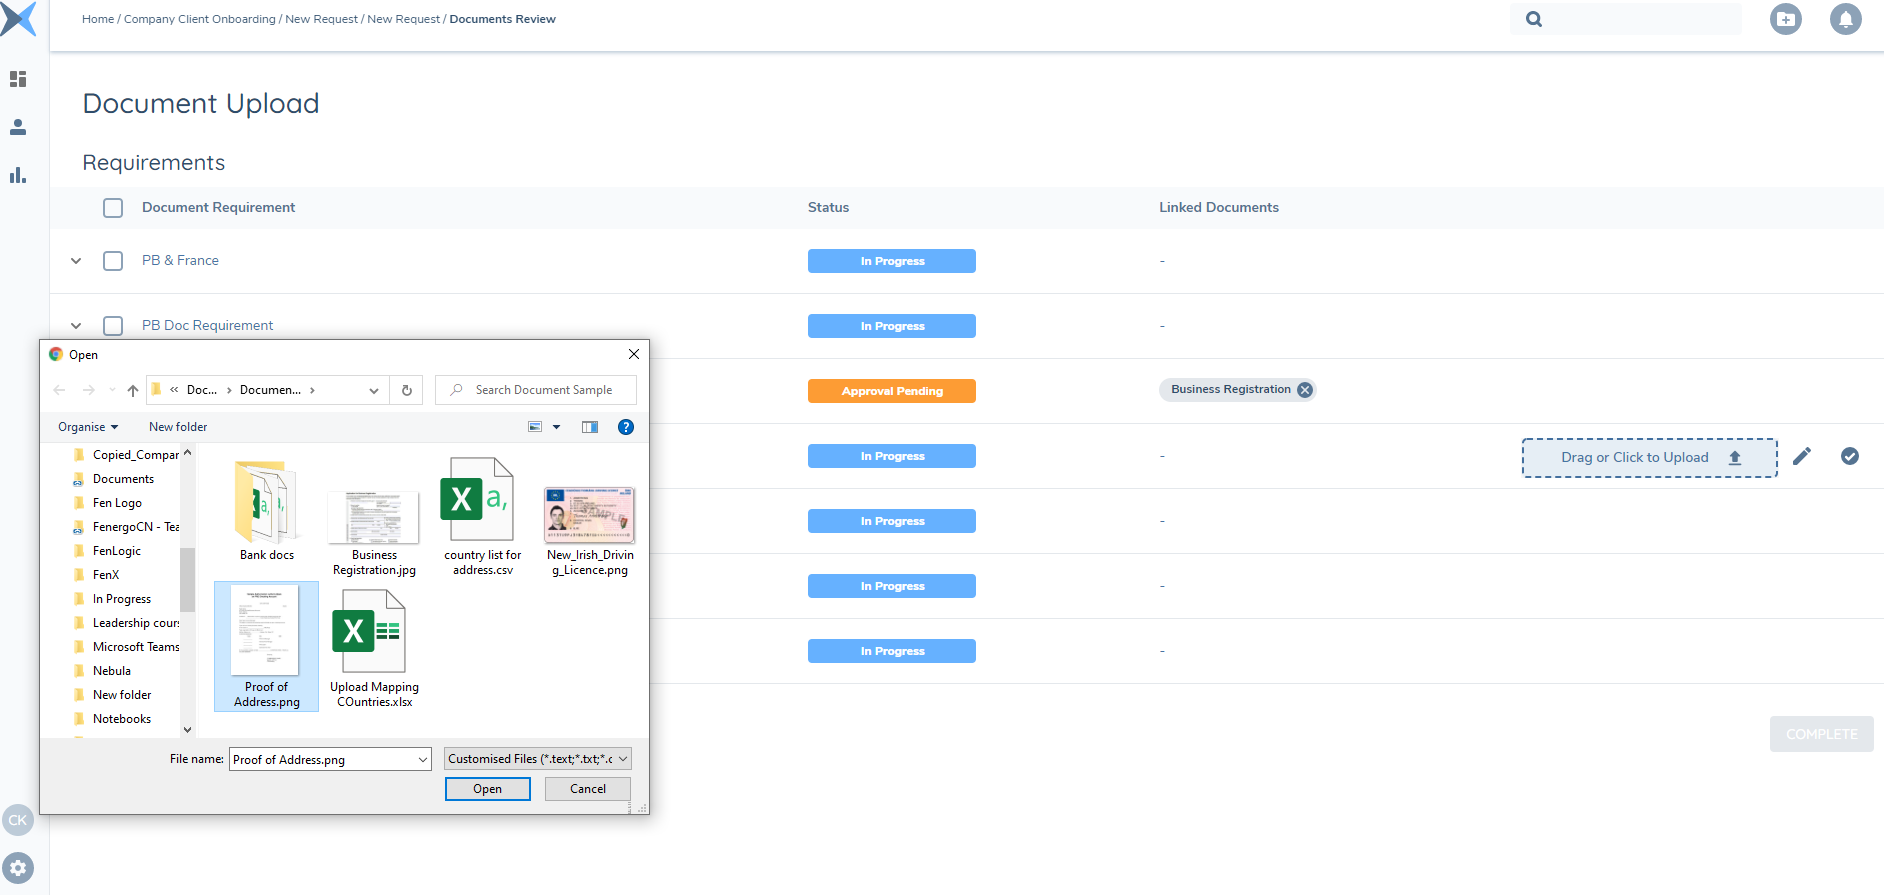
Only valid filetypes will be shown.
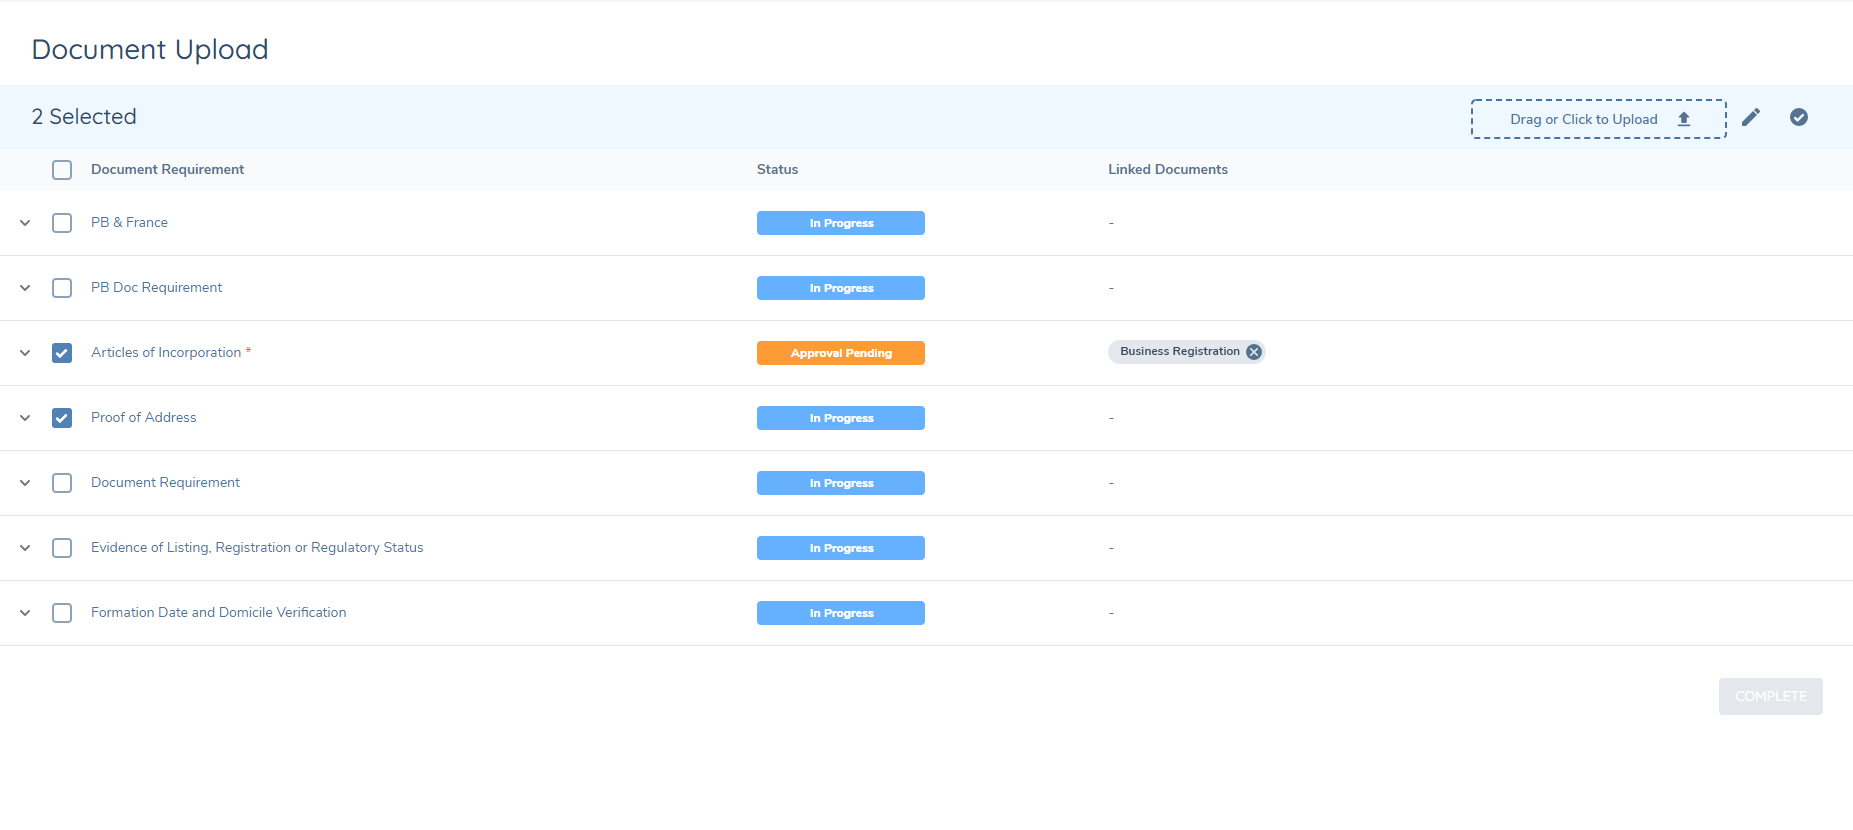
Bulk Upload
Select the checkbox beside the document requirements you wish to upload a document against. You can drag and drop to the dropzone at the top of the panel, or click the arrow in the dropzone to upload your documents via file explorer.
Uploading via the Entity Profile
A user can choose to upload any documents they receive via the entity profile page at any stage. This allows a user to capture all documents against the entity and reuse the documents when they are in the relevant journey.
In the grid view on the profile page, you will also see all documents that have been uploaded to the entity in any journey.
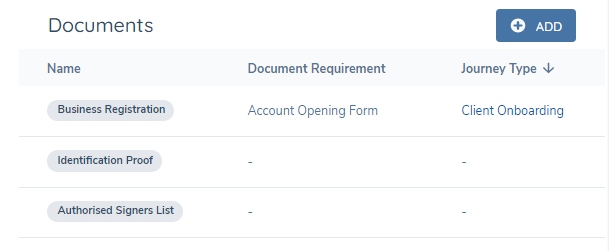
In the above screenshot you can see that two of the documents are not attached to any document requirement or journey type. This is because they have been uploaded directly to the entity and have not been used as part of a journey yet.
Available Documents
You can reuse documents to satisfy the requirements if they have been uploaded to the entity via the APIs or as part of a previous journey. You access these documents by clicking on the arrow to the left of the document requirement which expands out the grid underneath.
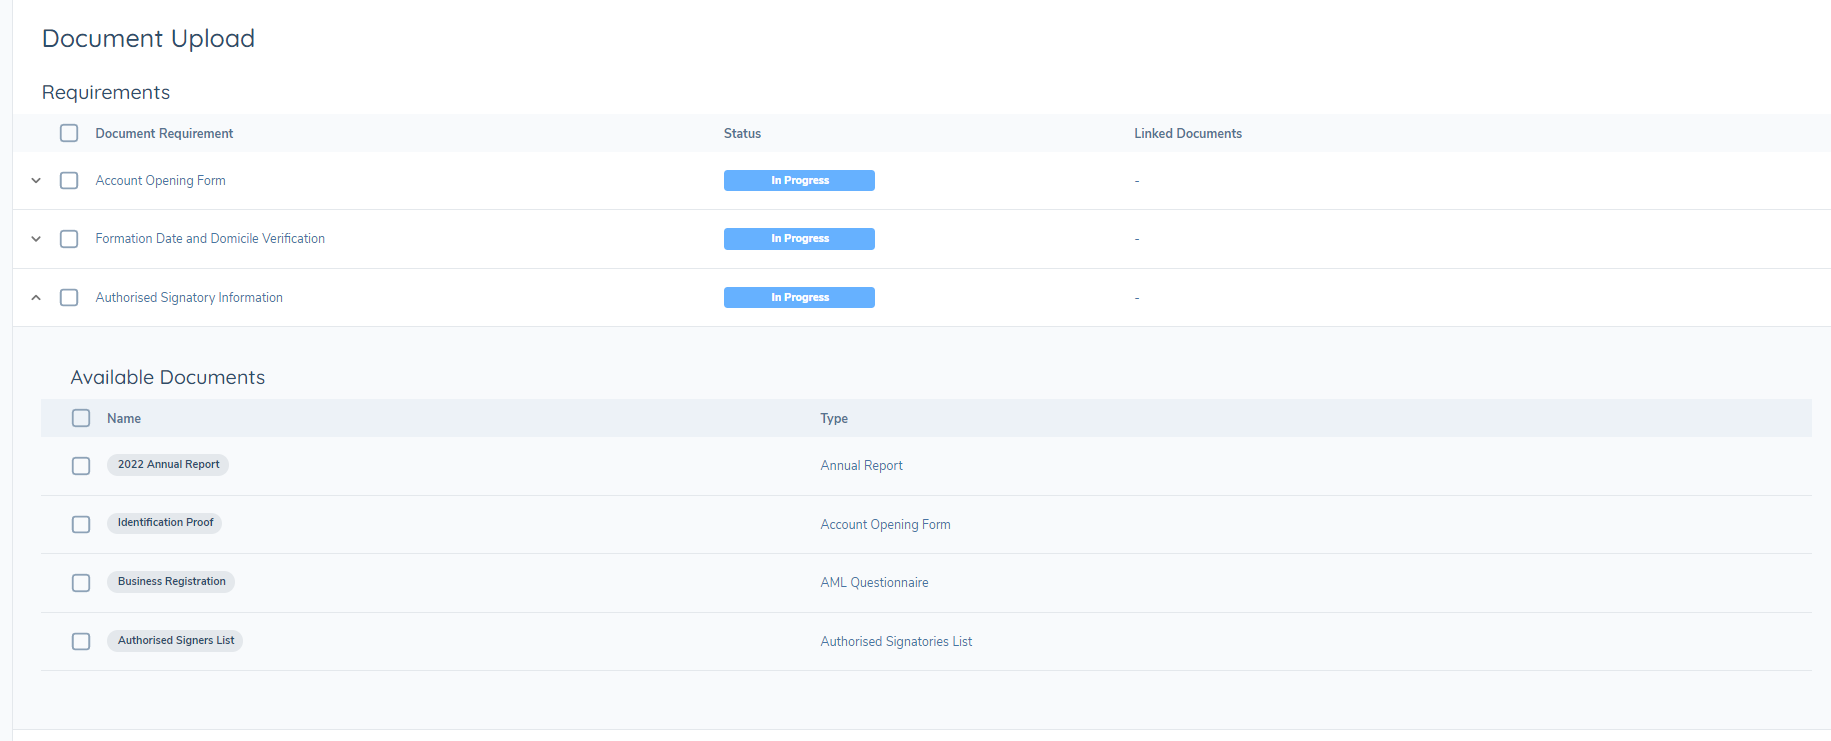
The metadata that has been captured on the document previously will also appear in the pop up modal when you select to upload.

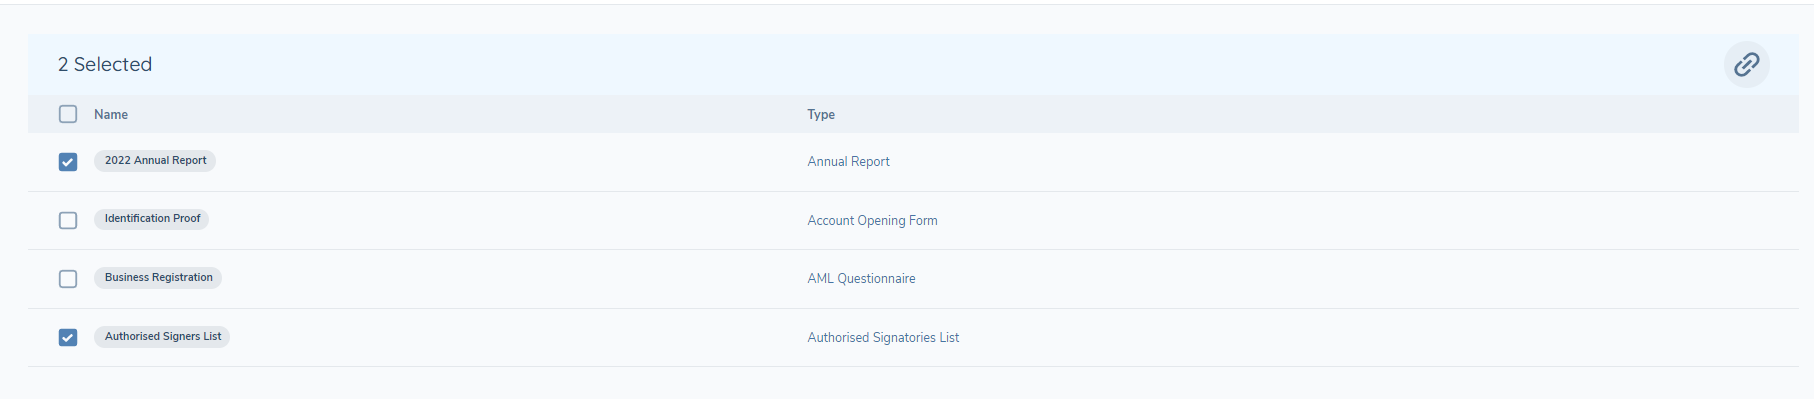
You have the ability to upload more than one document at a time using the multiselect functionality as well.

If a document that you have uploaded as part of a previous journey is not here, please check to ensure that you uploaded it to the correct entity and not a related party.
Document Metadata
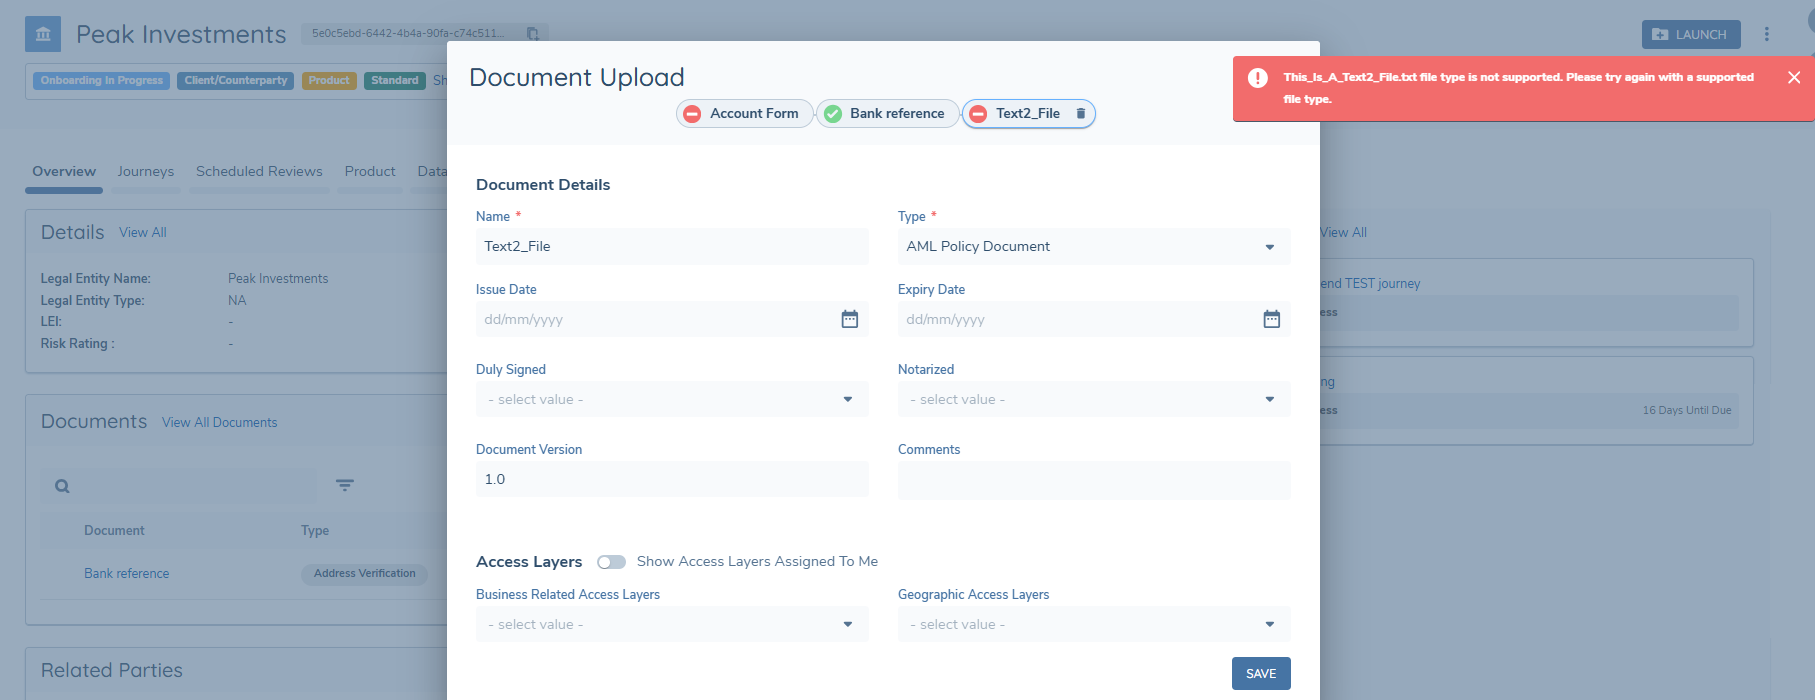
After you have selected documents for upload, a panel will appear on the screen. This panel allows you to add the document metadata to the documents you have uploaded. The default fields are the friendly document name and document type.
- Name: The document name will default to the name of the document you have just uploaded, but this will allow you to change the name to something more meaningful before you save the document.
- Document Type: This is driven from the lookup called "Document Type". To add to this list, navigate to the reference data editor, and edit the "Document Type" list. Saved changes will be reflected here.
- Business Related Access Layers: These are business line level restrictions a client sets up in order to restrict access to documents. To edit this list, navigate to the security configuration – access layers. You can then set up any business related categories you want. Further details on this can be found in the identity access management user guide.
- Geographic Access Layers: These are geographic level restrictions a client sets up in order to restrict access to documents. To edit this list, navigate to the security configuration – access layers. You can then set up any geographic categories you want. Further details on this can be found in the identity access management user guide

To configure additional fields to appear in this modal, refer to Configure Document Metadata.
Document Viewer
When a document has been uploaded, an antivirus check will be performed.

The page will automatically update the status of the antivirus scan. If a document passes, it will be viewable. Click the chip to view the document. If the document fails antivirus, or any other checks (like MIME type restrictions) it will turn red so that the user can take action by removing the document and a tooltip will provide the error message details when a user hovers over the chip.
If the file fails to upload within 30m due to local network or any other reason, then the system will reject the document model with the appropriate error message**

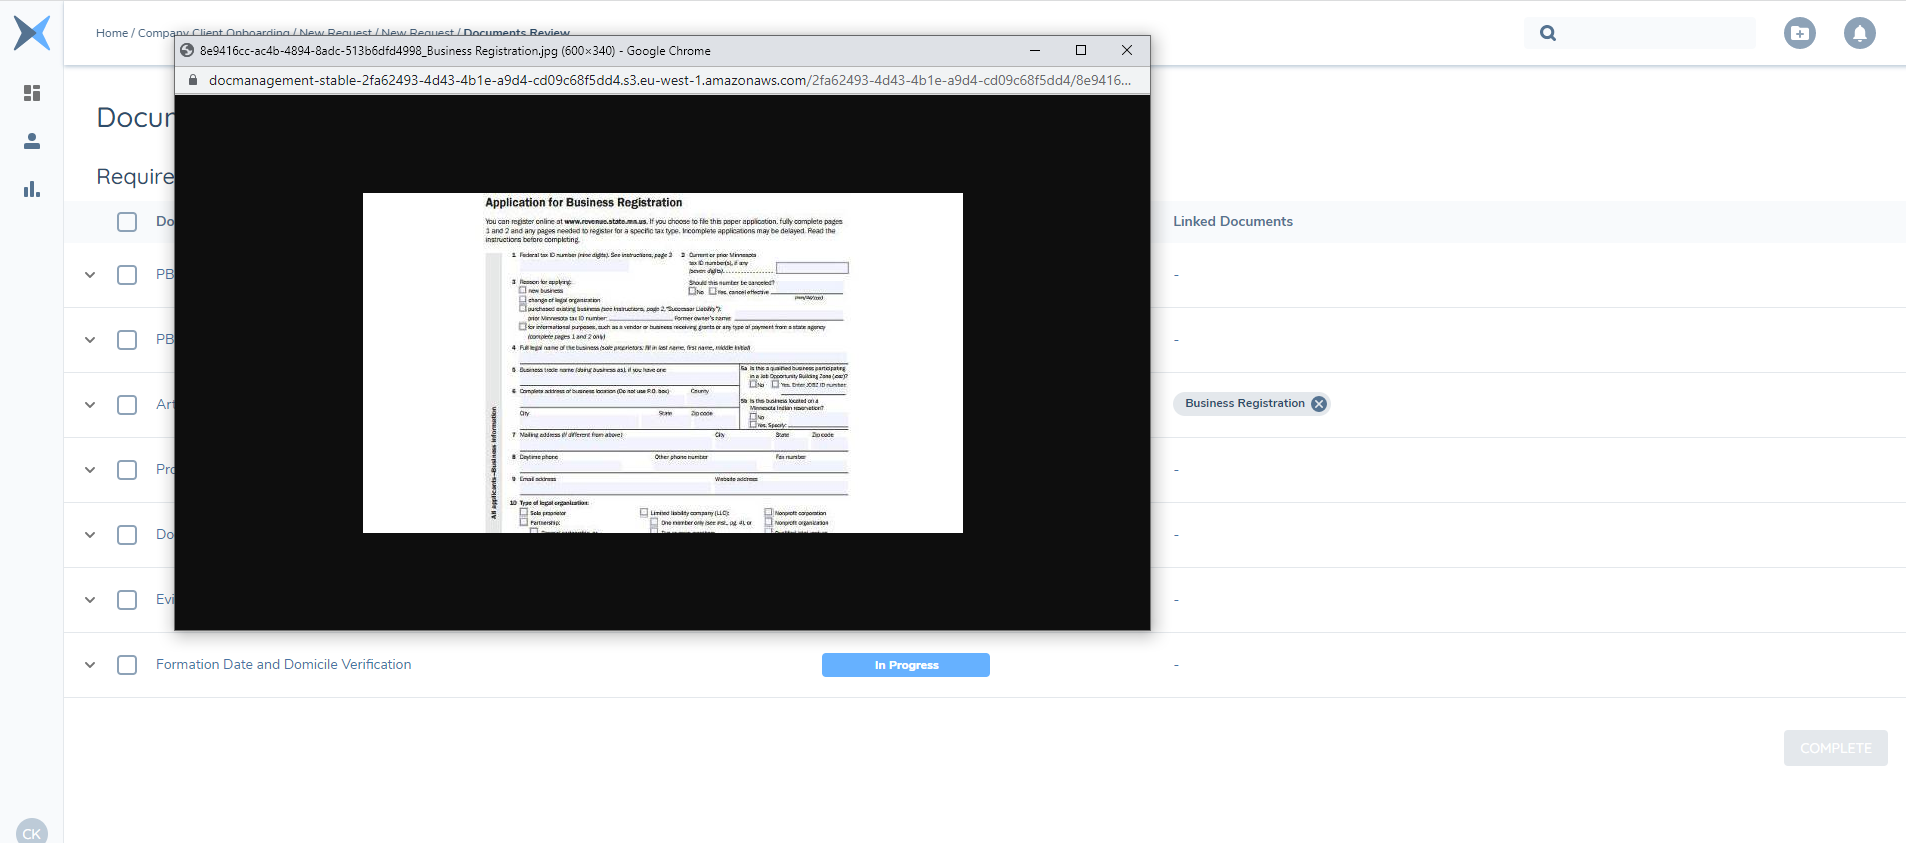
The document will open in-browser in a new window. You can move this window around and continue to use the Fenergo SaaS application while it is open. You can open multiple documents at once.
Changing Document Requirement Status
Click the tick icon on the right to update the requirement status. Users can update the status and leave an optional comment to detail their action.

When a requirement is "In Progress", users can:
- Request to Waive
- Submit for Approval
- Request to Defer (and give a date to defer until)
If a status is "Waive Requested", users can:
- Submit for Approval (if they have subsequently uploaded a document and want to interrupt their request)
- Cancel Request (send it back to "In Progress")
- Waive (If they have the relevant permissions)
- Reject (If they have the relevant permissions)
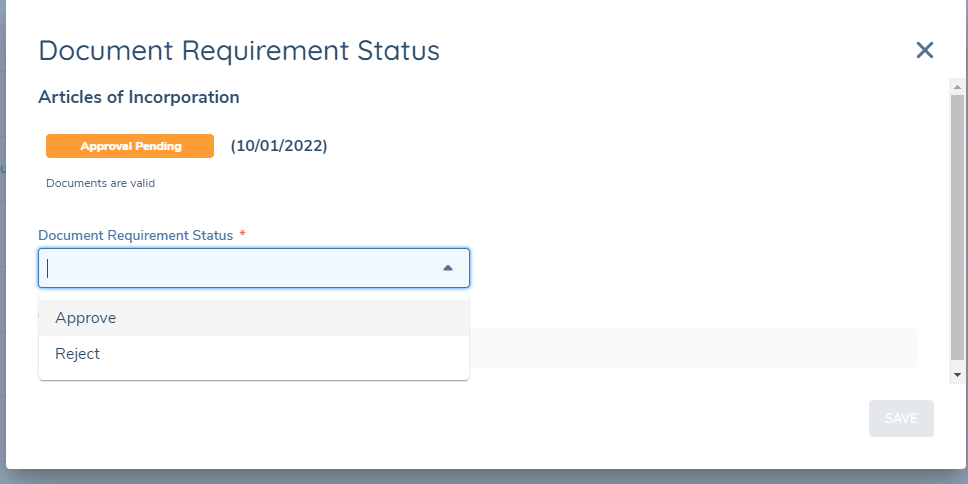
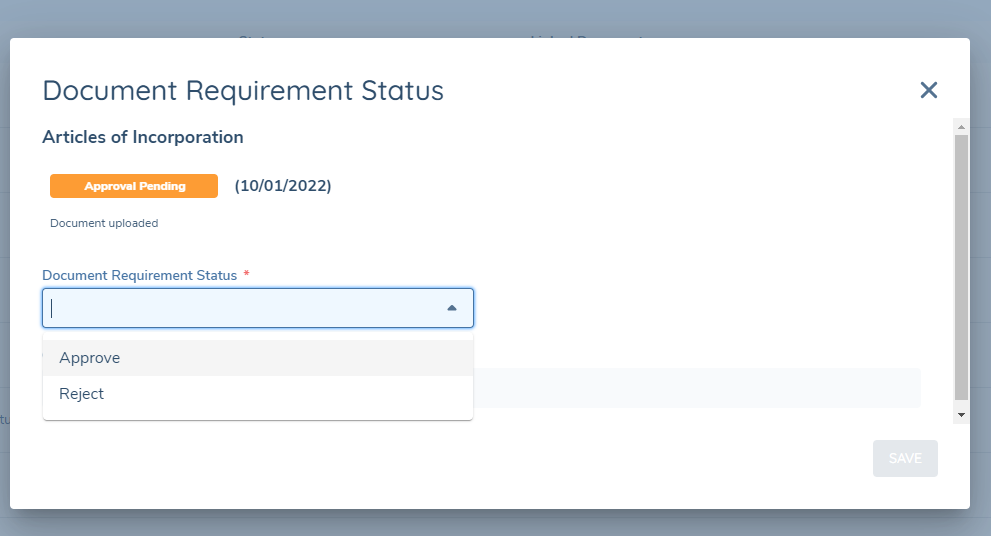
If a status is "Approval Pending", users with relevant permissions can:
- Approve
- Reject
If a status is "Rejected", users can:
- Request to Waive
- Submit for Approval
- Request to Defer
If a status is "Deferral Requested", users can:
- Submit for Approval (if they have subsequently uploaded a document and want to interrupt their request)
- Cancel Request (send it back to "In Progress")
- Defer (If they have the relevant permissions)
- Reject (If they have the relevant permissions)
If a status is "Deferred", users can:
- Request to Waive
- Submit for Approval
- Extend Deferral
When the "defer until" date of a deferred requirement is reached, the status will automatically return to "In Progress".
If a status is "Waived", users can:
- Submit for Approval (if they have subsequently uploaded a document and want to override the waive)
If a status is "Approved", no further action is required.
It is possible to collate an entity's deferred documents on journey completion for collection in a journey at a later date by utilising the Review Manager. Please see Document Deferral user guide for more information.
Document Requirement Status behaviour:
When a Document has been uploaded to a Document Requirement, the Document Requirement Status will automatically update to 'Approval Pending'.

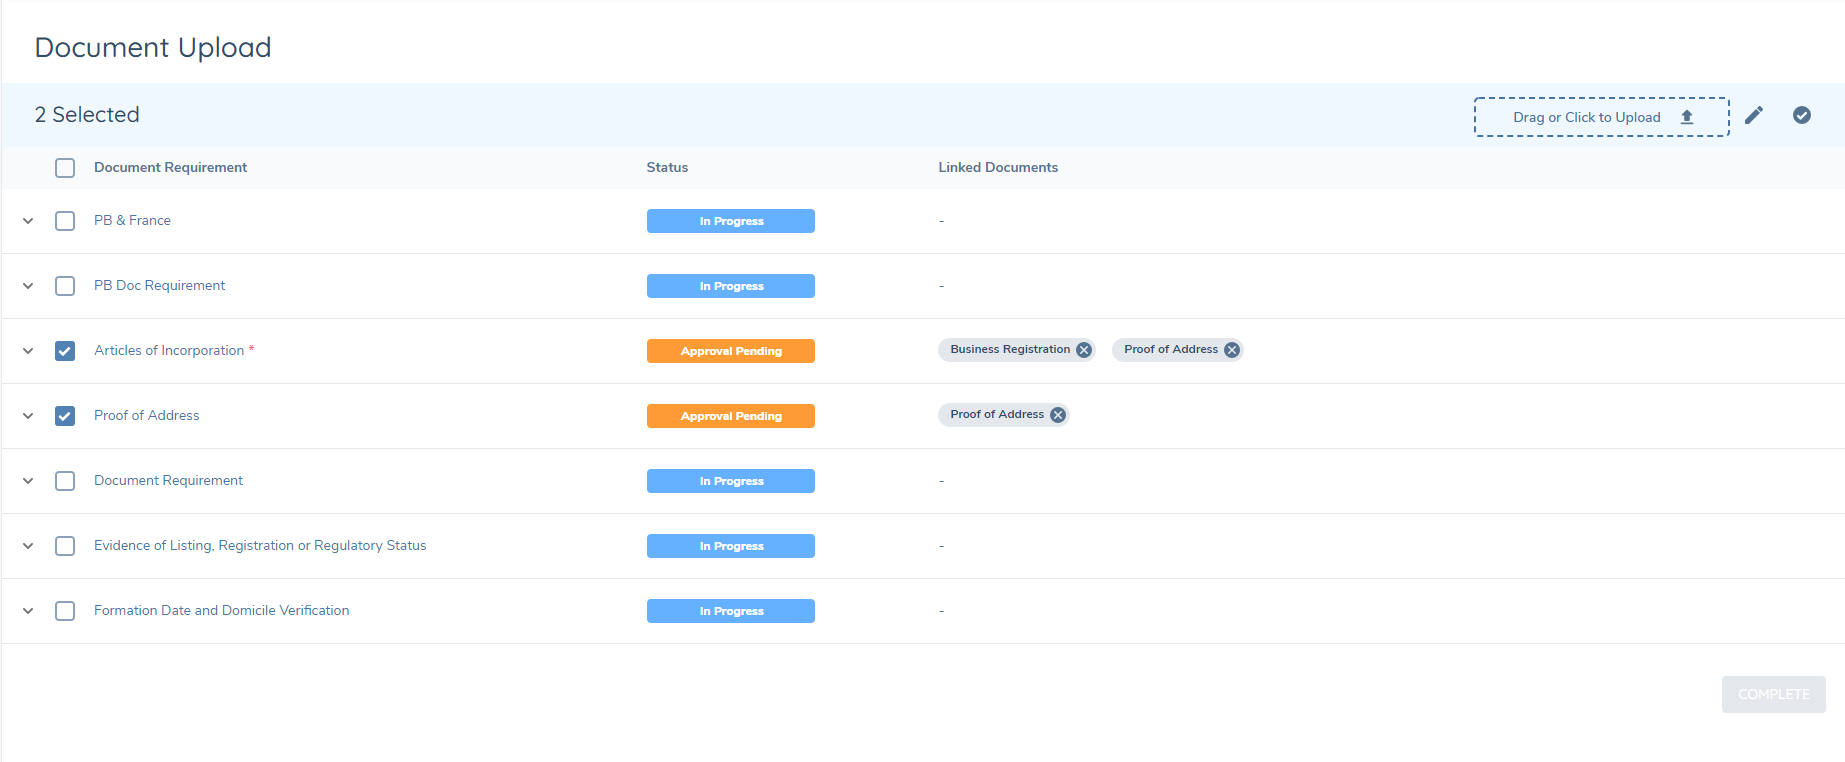
Bulk Update Status
Users can bulk update multiple requirements at once. Use the checkboxes to select which statuses to update, and click the tick icon on the top right of the panel.
This will open a modal with multiple requirements. The section at the top will update the status of all the selections. The dropdown will only show the available statuses that the selections have in common.
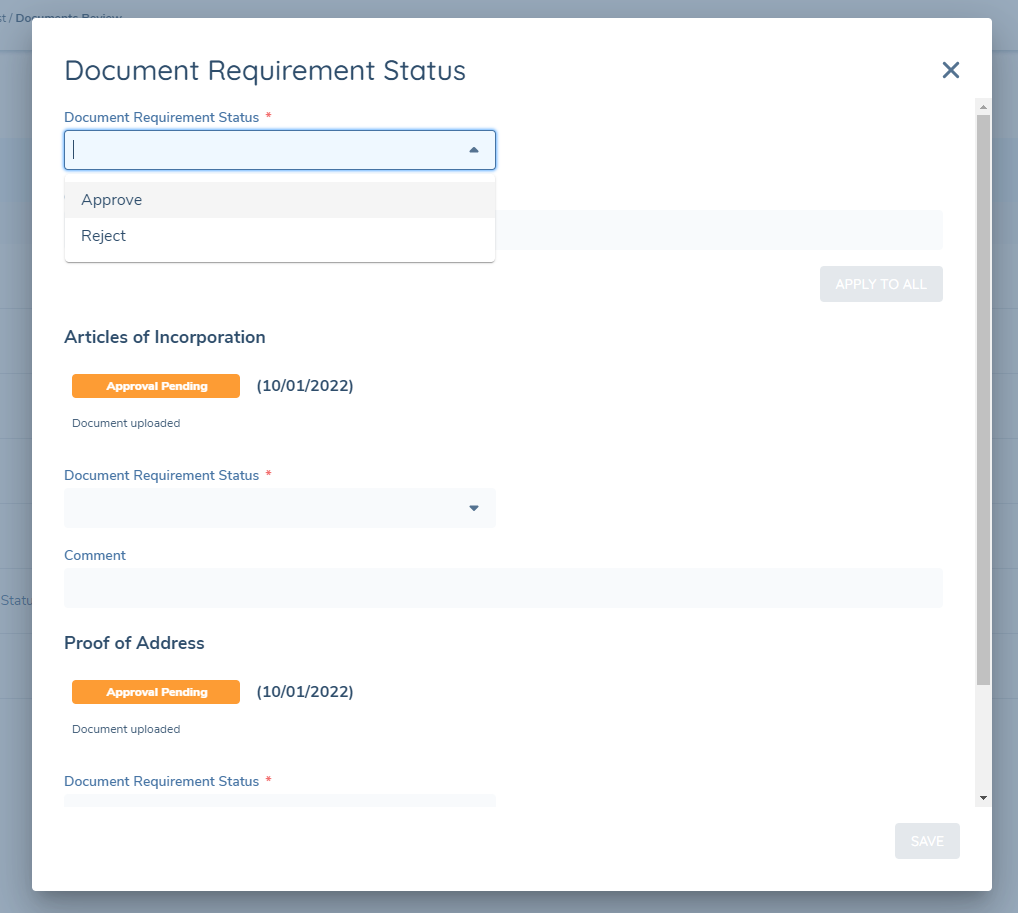
Clicking "Apply to All" updates the status of the selections instantly.
When a user selects incompatible statuses, some statuses will not appear in the bulk update dropdown. In this example, "Rejected" and "Approval Pending" have no next status in common.
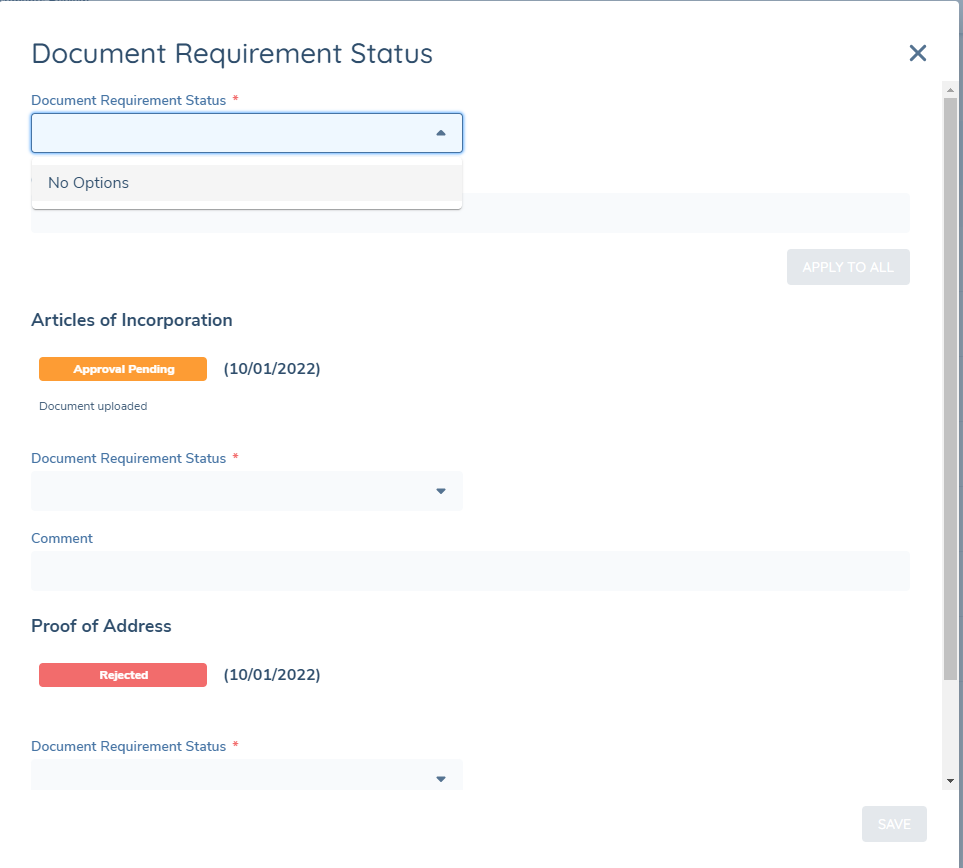
Users can still use the modal to update the selections individually if necessary.
Clicking save will update these selections.
Removing a Document
You can remove any documents that have been uploaded by clicking the 'x' on the chip.

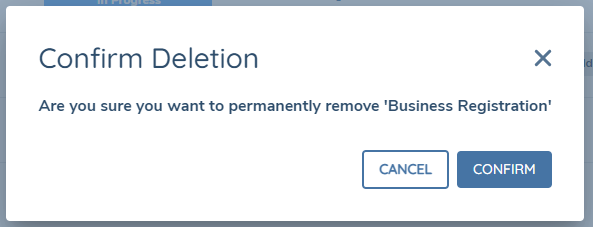
If you have uploaded the same document to multiple requirements, you will have to remove it from each requirement, but this can only be done if the journey(s) in which the document has been used is still in progress. Removing a document from a requirement does not delete it from the database unless it is no longer linked to any requirements, including requirements from completed journeys.
Configuring Document Management
The documents task allows users to upload, view, and approve documents that satisfy the necessary requirements to progress their journey.
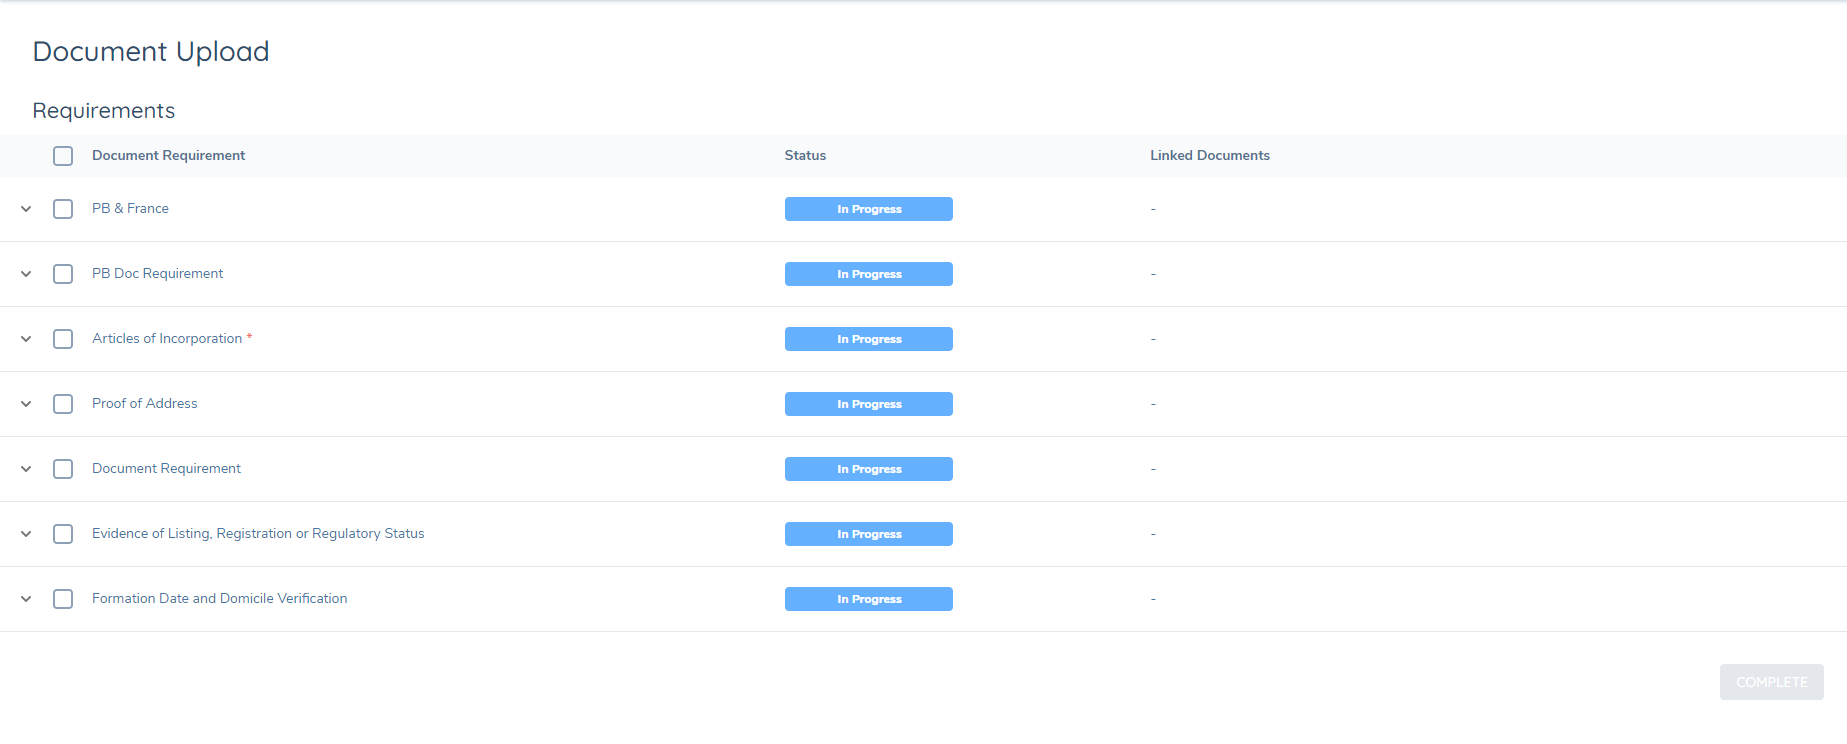
The document requirements are configured in policy. Using the requirement categories and journey builder, users can configure which requirements appear at which stage in the journey. By default, document requirements are sorted by mandatory status, with mandatory documents displayed first, followed by the remaining documents in alphabetical order.
Here, the document requirements have been split into categories of "Basic Details".

In the journey builder, the task is configured to capture any documents with a category of "Basic Details"
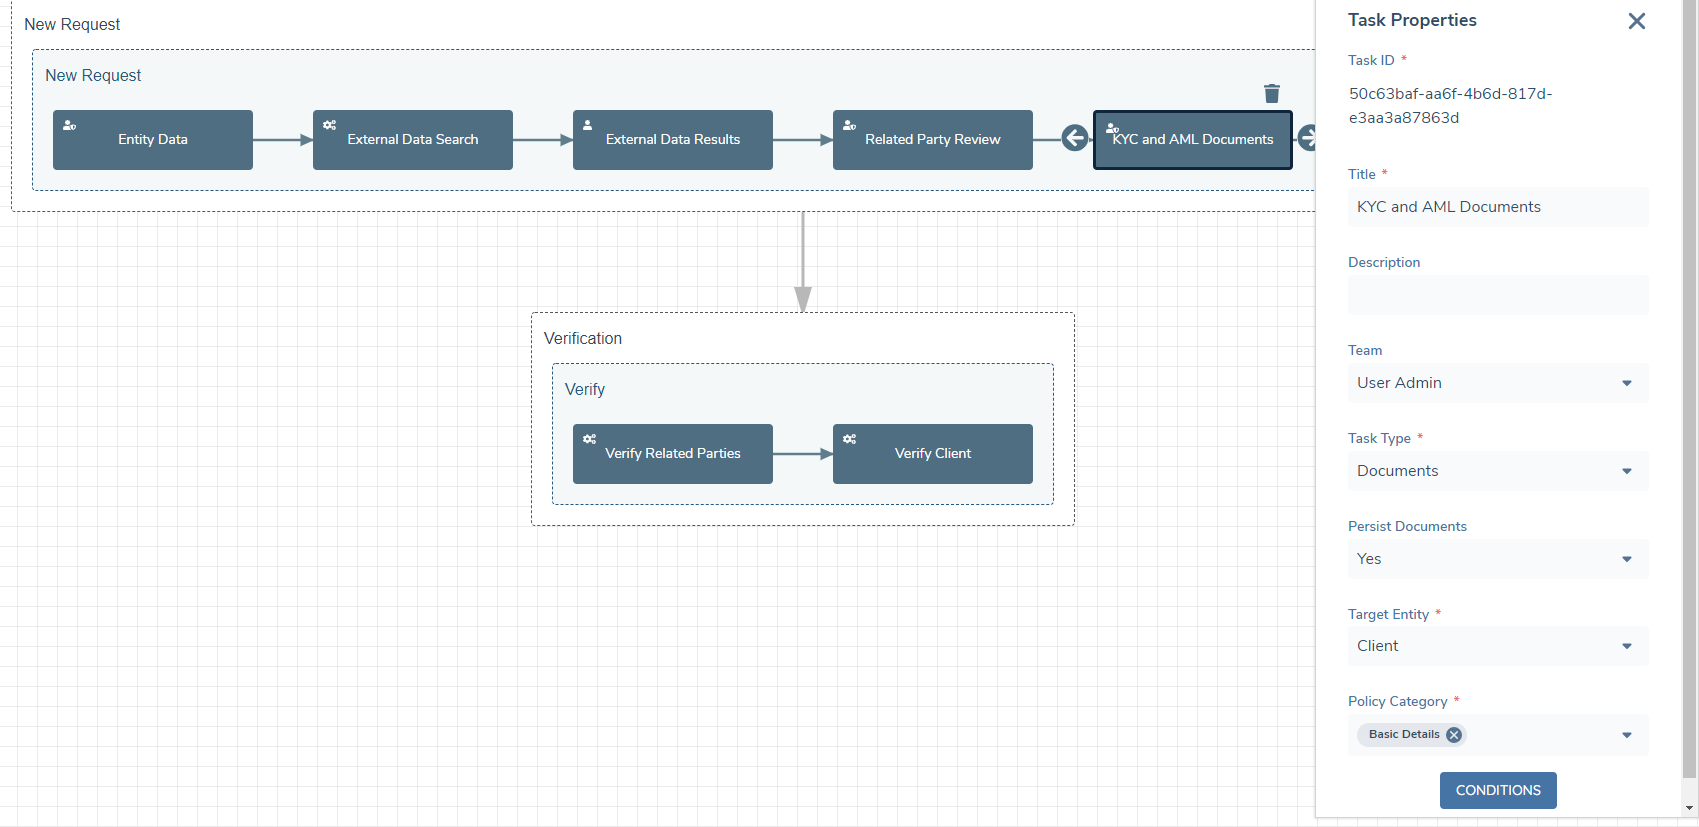
User can have as many documents tasks as they like, in any order they want in the journey.
Configure Document Metadata
Navigate to Policy configuration, and then to the Data Groups panel. Here, there should be a data group called "Document Metadata". If no data group exists, you can create one.
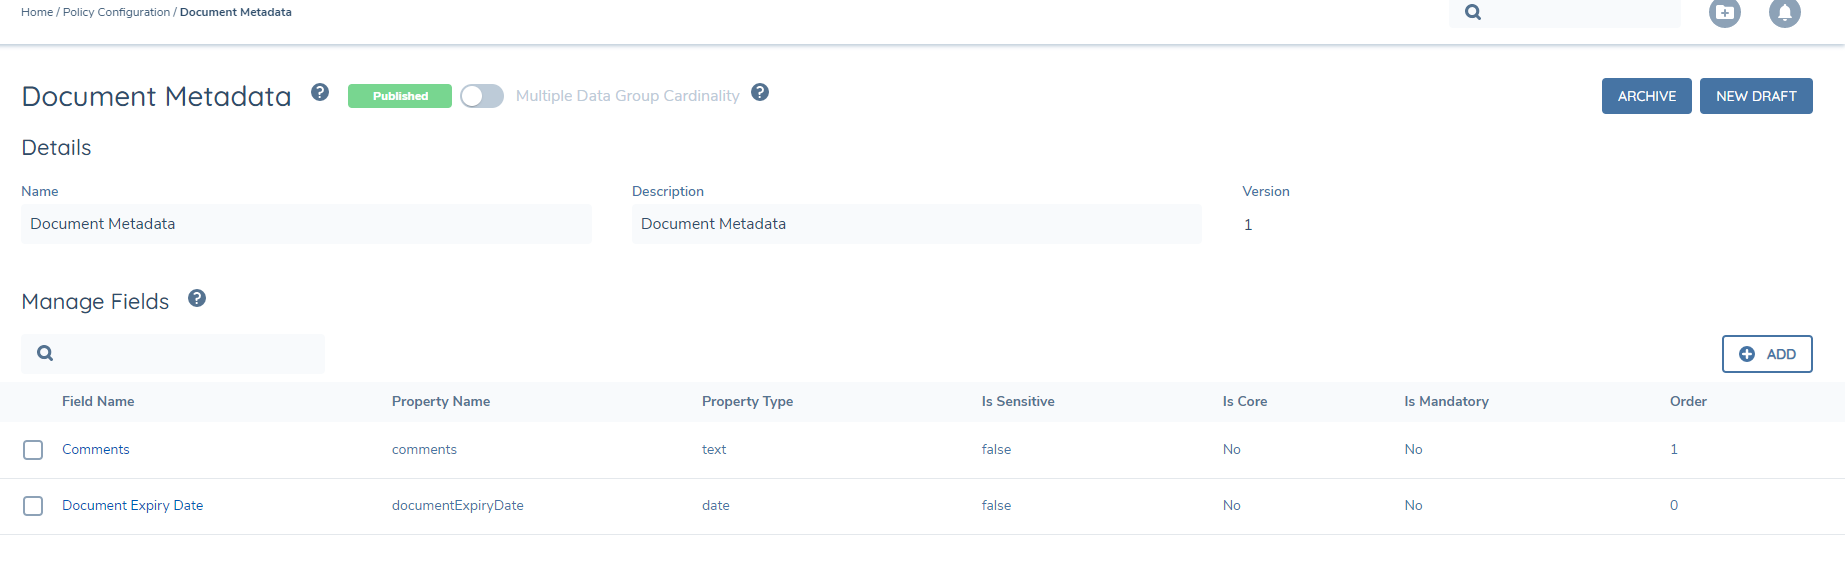
To add additional fields, create a draft of the Document Metadata data group and select "ADD" under Manage Fields. On the Field Details page you must capture the Field Name, Data Field Name, Data Field Type and Field Order. You can also add a Tooltip Description and Tags.
Please note, "Current Data Group Item" and "Current Entity" are the only sources that can be used for trigger conditions in Document Metadata. The "Current Data Group Item" allows you to trigger fields based on other fields in Document Metadata and the "Current Entity" source allows you to trigger fields based on entity data. This configuration will impact the Document Upload Modal and the Create Virtual Document Modal in a Documents task and on the Entity Profile.
To add a trigger condition for a field:
- Navigate to the Trigger Condition tab and select "ADD".
- Name your condition.
- Select the source.
- Select the field.
- Select the operator.
- Select the value.
If, for example, you select: "Current Entity" as the source, "Legal Entity Type" as the field, "Equals" as the operator and "Bank" as the value, then the field will trigger when the Legal Entity Type of the Current Entity is Bank.
To add a validation for a field:
- Navigate to the Validations tab.
- Click the "Mandatory" toggle.
If you stop at this point the field will be mandatory in all circumstances when it is triggered by the trigger condition. If you only want the field to be mandatory under certain conditions, complete the following steps:
- Change the type from "Static" to "Dynamic"
- Follow the same steps as when creating a trigger condition for a field.
If, for example, you select: "Current Entity" as the source, "Country of Incorporation" as the field, "Equals as the operator and "Ireland" as the value, then the field will be mandatory when the Country of Incorporation of the Current Entity is Ireland.
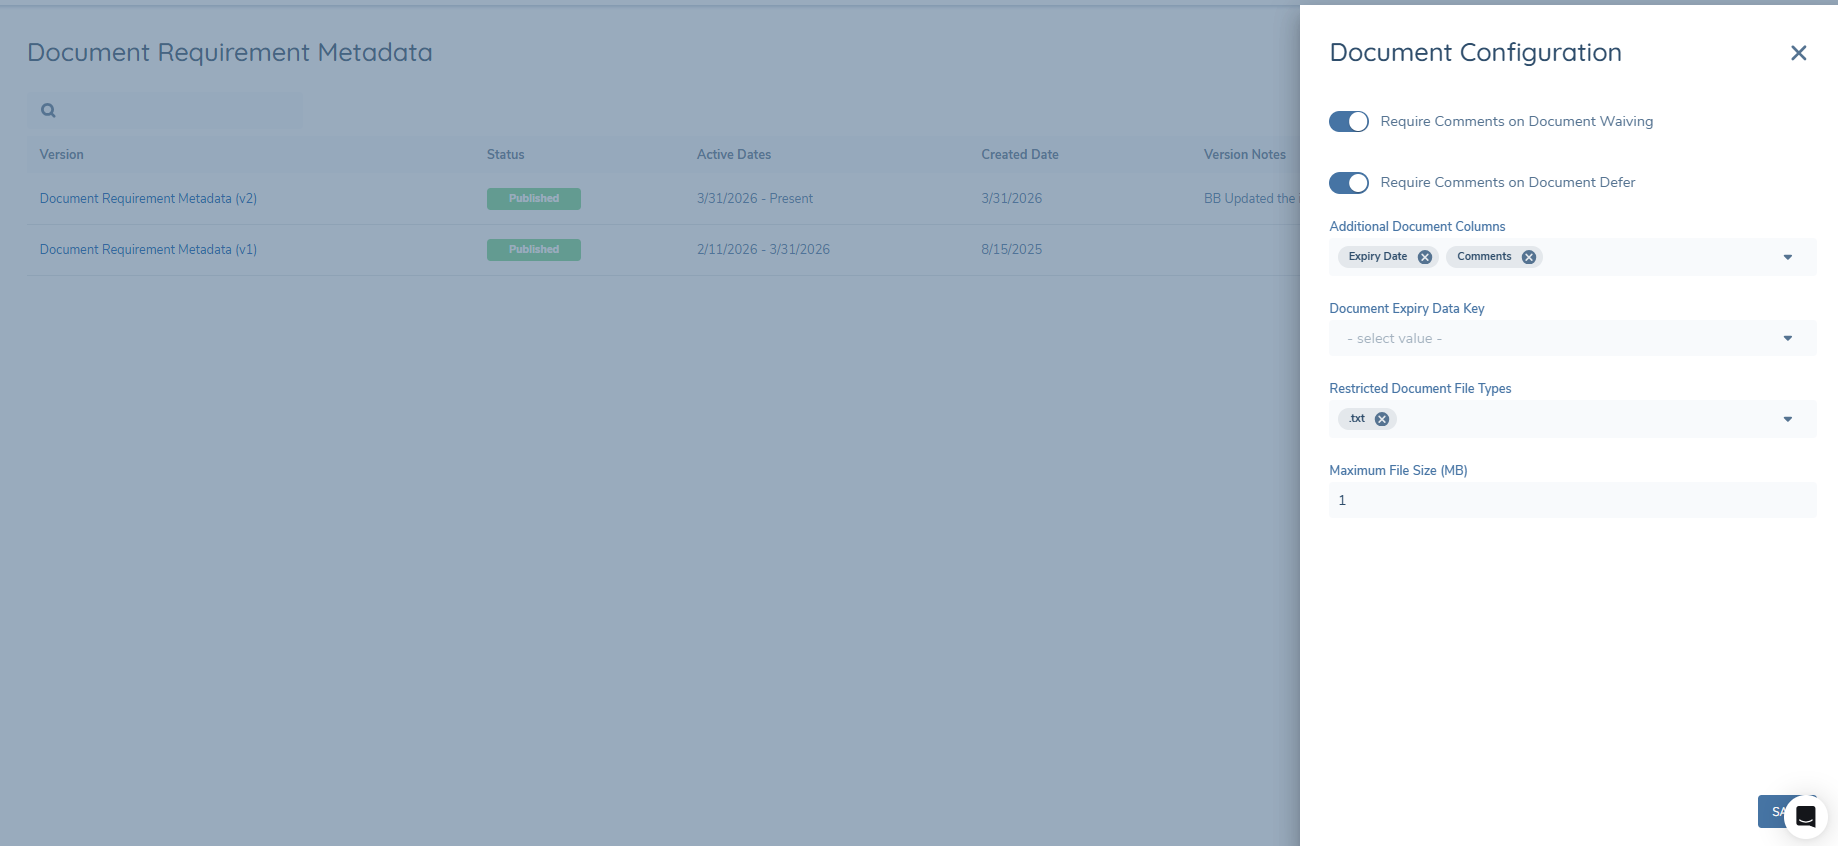
Restrict File Size and File Type
On the Document Metadata Configuration page in the Reference Data Domain, users can click on the gear symbol to open a side panel. They will see:
- Restricted Document File Types — drop-down field
- Maximum File Size (MB) — text field
Users will need to click the Save button to save and apply their changes.
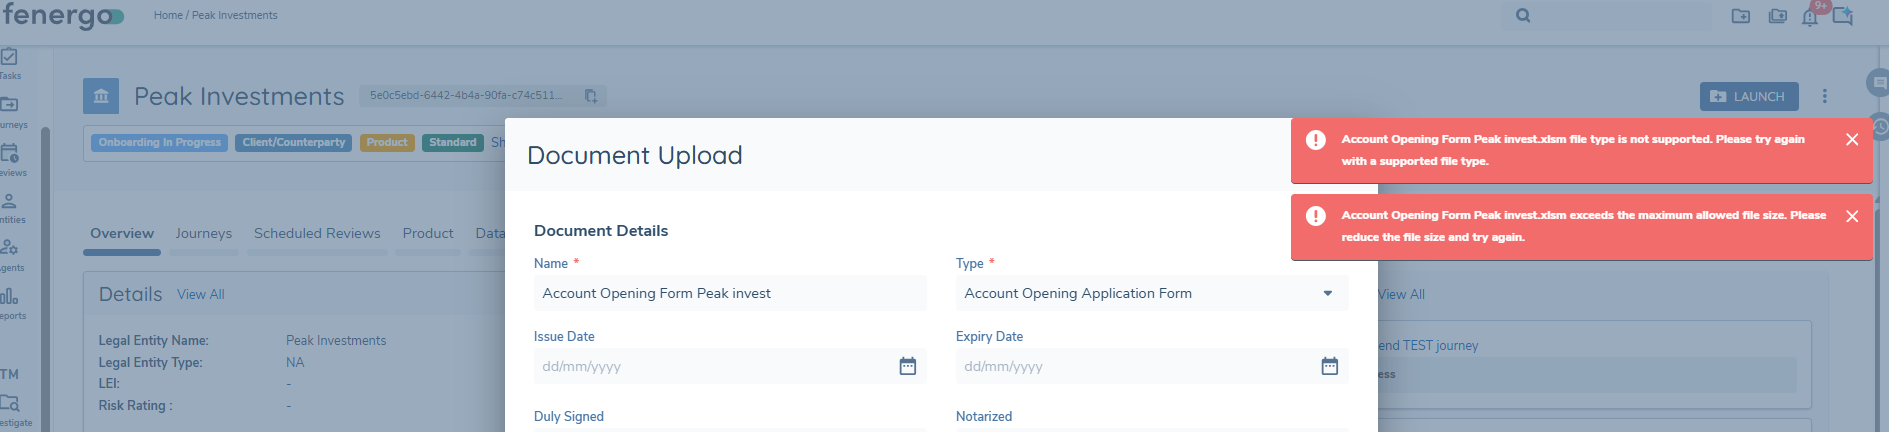
How Restrictions Are Applied
The restriction will apply anywhere a document can be uploaded. When a restriction is set, the user will see one message per file and per error. If a document fails to upload because of both the size and type restriction, 2 messages will display.
Bulk Document Upload
On the Bulk Document Upload Modal, if any of the documents fail to meet the acceptable file types or file size, it will not upload that document — but the user can continue to upload the other acceptable documents.