Working with Policy
Policy is the catch all name for the data, document, and related party rules that drive the requirements within Fenergo SaaS. This is defined at the tenant level and applies for all entity types and all jurisdictions. If you see a field, document requirement, or related party capture request, it is because Policy has a rule behind it.
Policy is structured as a centralised rulebook that is called by other services, allowing it to be updated without affecting other areas of the system. From a maintenance administration perspective, this allows us to update one rule and have it cascade to all areas that use it, and to all journey types.
The information below gives an overview of how to use the components that make up the Policy feature.
Policy is split into two separate tools: Policy Configuration and Policy Search.
Policies and Jurisdiction
Depending on the size or remit of a financial institution, multiple policies may be required. When they are required, these policies are split by Jurisdiction.
The standard policy jurisdiction is ‘Global’, which defines the baseline dataset for clients and includes the fields common to all jurisdictions. Every client will trigger the Global policy by default. It is also the policy that defines the fields on standard screens like New Request. New Request has now been enhanced to support Conditional fields within the Global Policy for "Basic Details", so that Users can avail of these Conditional fields when creating new Entities.
To create a policy, click the ‘+ ADD’ icon on the policies grid.
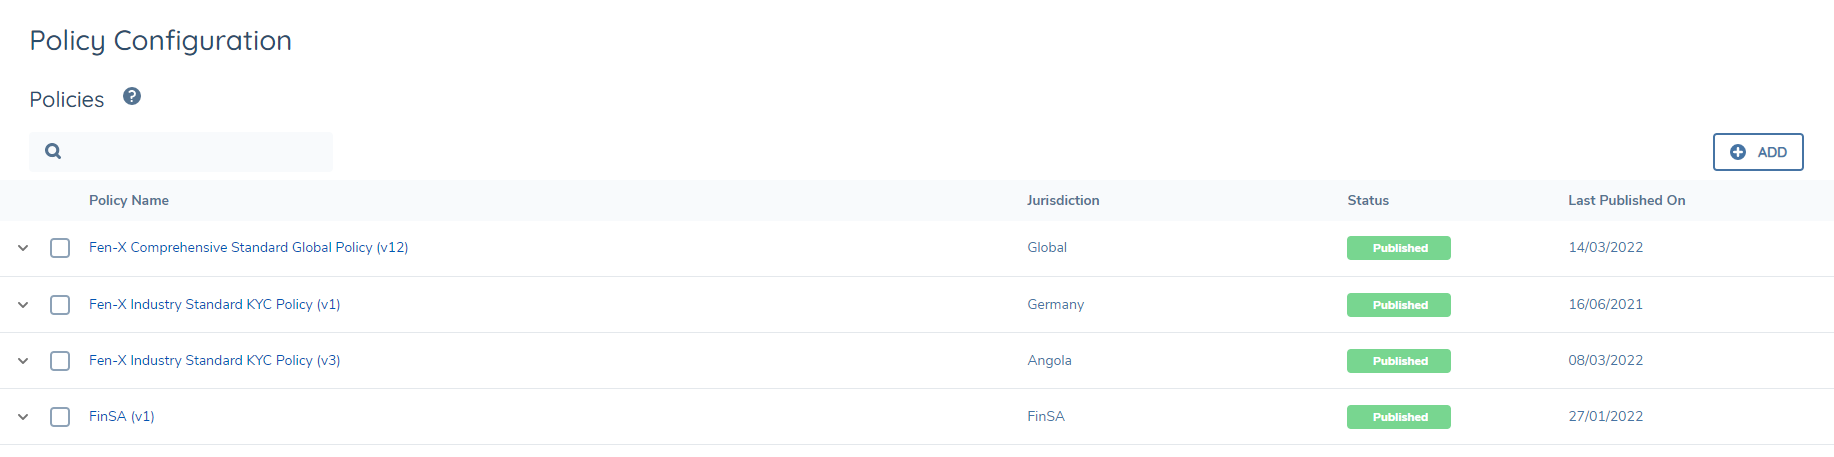
Populate the Policy Name and Jurisdiction fields, then click the Save button.

Then, Policy Scoping rules must be defined to trigger a jurisdictional policy.
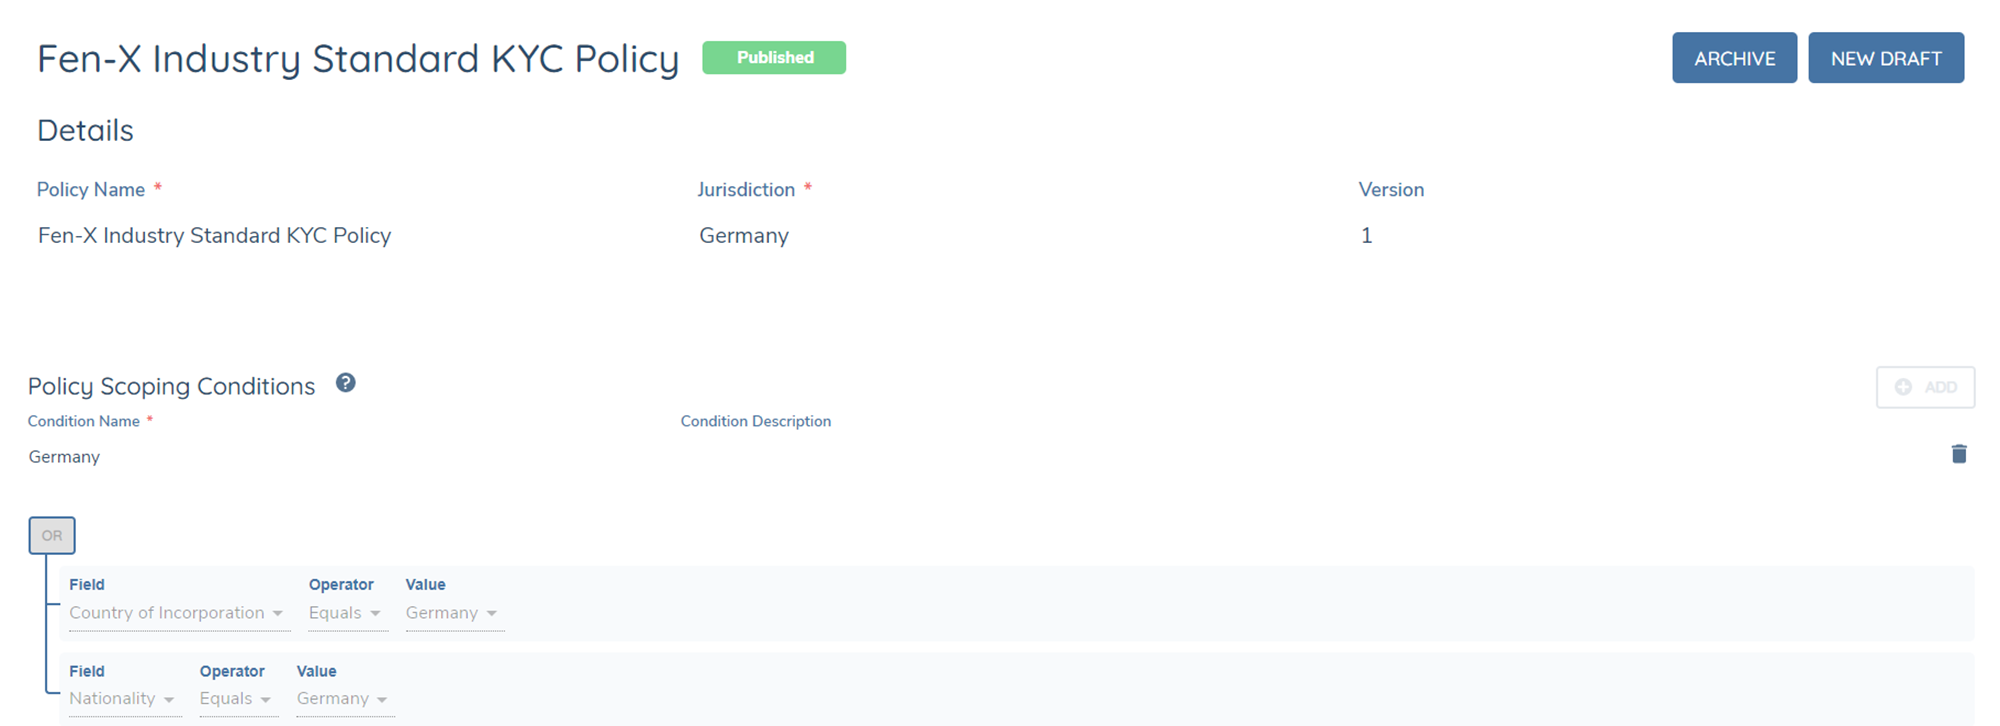
Policy Scoping
Policy Scoping defines when a policy should apply for a client according to the set of rules attached to the policy. It is important to know that if policy scoping rules are not set then the requirements will not be captured during a journey.
For example, if the policy scoping rule was Country of Incorporation = France, then the client will be prompted to provide information to complete the French KYC fields in their Client Onboarding journey. So the client will now be in scope for the Global policy + the France policy.
Field Ordering
Field Ordering allows us to set the order in which fields appear in their Category. This is a centrally defined value that will affect all screens in which the Category is used.
Note that the Categories are still listed Alphabetically. This will be extended in a future enhancement.
The idea here is that the field order is set as part of the requirement. This is required for Data requirements only. We do not set field order for Documents or for Ownership & Control.
Defining Field Order
Field is an optional field that defaults to null for a new requirement.
It is captured as a positive number, and supports decimal to one place. Negative numbers are not allowed. As much as possible integers should be used, for simplicity’s sake. So Field order 1 appears in the 1st position, field order 2 appears in the 2nd position, etc. The decimal is enabled to allow a ‘get out of jail’ where you might have forgotten a field in between two existing fields.
Expressing Field Order in the UI
The position of fields is driven by:
- Categories
- Field Order
- Data Groups
Data Groups will always go at the end of the screen.
The order of the fields should be based on the Categories, and secondarily on the Field Order value we set.
Note that Global is the dominant order. Where the order is defined for another policy with a matching field (e.g., UK or Spain), the Global policy takes precedence. The matching of duplicated fields is driven off of the Database Field Name
It is expected that most clients will only need to define field order for the Global policy, as the most important requirements are drawn from that.
Where there is no field order defined, these fields appear at the end of that Business Category. Where there are two values with the same order, we will default to alphabetical order.
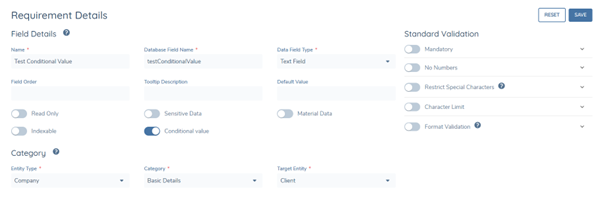
Conditional Values
Conditional Values allow the User to configure pre-defined Values to be set against a Data Requirement when the necessary condition[s] are met. It allows Users to configure default, read-only values for a Data Requirement.
To enable Conditional Values in Fenergo SaaS, Users will be able to select the "Conditional Value" toggle for the following Data Field Types:
- Text Field
- Text Area
- Number
- Date
- Select Dropdown
- Multi-Select Dropdown.
- Linked Select Dropdown
- Linked Multiple Select Dropdown
Removing Values on a Field
A key use-case for Conditional Values is the ability to remove a value from a field when the field is not triggered in a Journey. To enable this behaviour, we need to configure a conditional blank value for a field, and in the conditions we need to include a reference to when the field "Is Not Defined". The Conditional Value logic here will set the null conditional value if the rules are satisfied, while the Trigger Conditions configured will govern if the field is presented in the UI or not.

Important Note: Trigger Conditions and Conditional Values work independently of one another. A field may not be presented in the UI for a User, but if the rules for the Conditional Value are satisfied, the configured value will be set against the field.
Conditional Values look at the entire Entity record, not just the fields presented in the UI.
Enabling Conditional Values in Journeys
A key component of Conditional Values is that when a Data Requirement meets the conditions for a particular Value to be set, it will then make the associated field read-only. The reason behind this is that the logic for the value to be populated on the field has been pre-determined in the Configuration in order to avoid human error or the intentional changing of values.
If a Conditional Value has been assigned to a Field, and then the Conditional Value rule is then subsequently no longer met, the last retained Value for the Field will persist but the field will now be in an editable state.
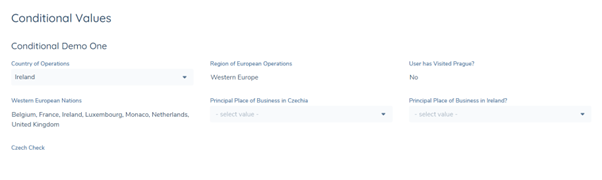
In the below example, the “Country of Operations” Value of “Ireland” sets Conditional Values in “Region of European Operations” and “Western European Nations”. These fields are now read-only.
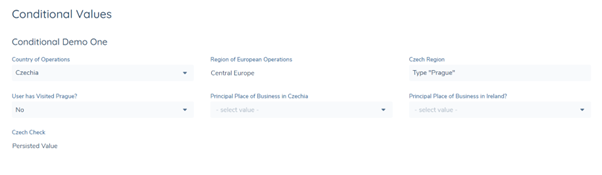
Changing the “Country of Operations” Value to “Czechia” updates the Conditional Value in “Region of European Operations” and sets the value to blank in “Western European Nations”. The “Region of European Operations” field remains in a read-only state as it is referencing a separate Conditional Values rule.
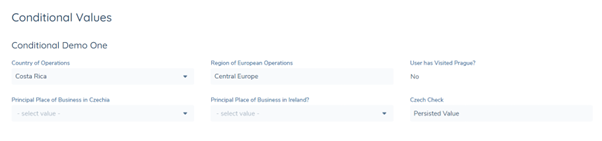
Changing the “Country of Operations” to a Value not configured in any Conditional Value logic for any other fields (e.g. Costa Rica) will persist the last retained value in the “Region of European Nations” field (Central Europe), but the field is now in an editable state.
Considerations Using Conditional Values
-
Setting a Conditional Value places the field in a read-only state. So long as the Conditional Value rule is being met, the field remains in a read-only state. This is something to take note of when using Conditional Values to “wipe” a field (i.e. setting a blank / “null” value). The field with Conditional Values assigned will retain the “null” value until the Conditional Value rule is no longer being met.
-
Conditional Values can be used to update/wipe/replace Values in Fields that are not presented in the Journey. Conditional Values can be used to update Values across Categories and Fields not presented in the User’s Journey UI.
-
The assigned Conditional Value will be set against a DataKey relative to the initial Data Field Type that the Conditional Value was configured against. If a User is to duplicate a DataKey, they must ensure that the DataKeys are all of the same Data Field Type. Failure to do so will create irregularities with the value that will be assigned as per the Conditional Value logic. Configurators should not duplicate DataKeys that are a different Data Field Type. DataKeys should not be copied across different Policies with different Conditional Values assigned, as this is not something the system currently supports.
-
Conditional Values are applied at a DataKey level per Policy. This means that if a User configures a set of Conditional Values for Datakey "countryOfIncorporation", all Data Requirements in the given Policy will have the same Conditional Values applied. If a new field is created using a DataKey that already has Conditional Values assigned and the User hits "Save" on the new field, the new field will inherit the existing Conditional Value logic. Alternatively, if a User creates a new field using a DataKey with existing Conditional Value logic assigned and chooses to update the Conditional Value rules before hitting Save, the new Conditional Value rules will overwrite all fields using this DataKey in the policy. If an individual Data Requirement with a shared DataKey needs to have unique Conditional Value logic assigned, the User will need to change the DataKey for the Data Requirement in question.
-
Conditional Values can be used in a multi-nested approach. This allows for the Configuration of Fields with Conditional Values assigned, where the Value in Field 1 inputs a Conditional Value in Field 2, which inputs a Conditional Value in Field 3 and so on. This should dramatically decrease the amount of data inputting required for known values from an operational viewpoint.
-
Currently, we can set a Conditional Value on a Data Requirement based on a certain rule being met within a Data Group. For example, we can assign a Data Requirement to set a Conditional Value of “Ireland” based on the Country selected in a “Country” dropdown within an Addresses Datagroup.
- We cannot currently configure the inverse, whereby a Data Group field is assigned a Conditional Value based on the value in a Data Requirement. This is something we will look to address as part of future releases for Conditional Values.
Policy Search
The Policy Search screen is where the user can find specific data, document, and ownership & control requirements based on whatever criteria they wish to search for.
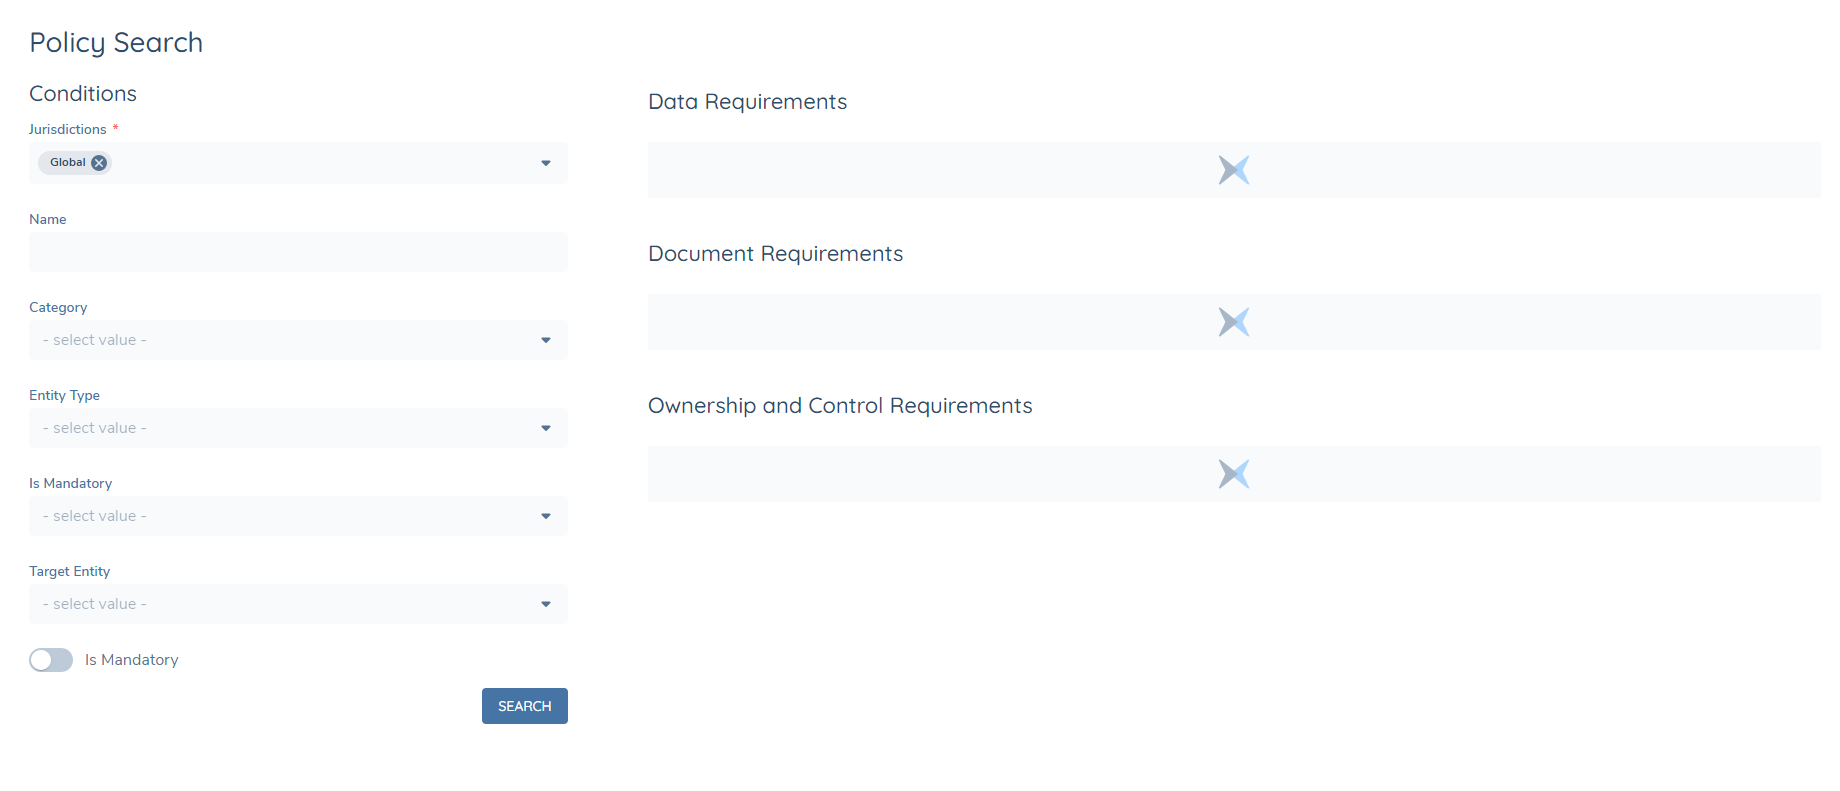
Search is useful for testing and confirming the requirements that result from a certain set of criteria. Additionally, it can be used as a starting point for configuration – through the search functionality, the user can quickly identify and navigate directly into a requirement they need to review and/or modify.
Note that this Search screen will be replaced by a new, more powerful search feature in the future.
Policy and the Entity Profile Page
Once a Policy is scoped for an Entity and verified in a JOurney, it will remain indefinitely until it is offboarded and the data retention period date for said offboarded Policy is met. We evaluate that component each time a journey + its entity draft (containing in scope + to-be-offboarded Policies) are verified.
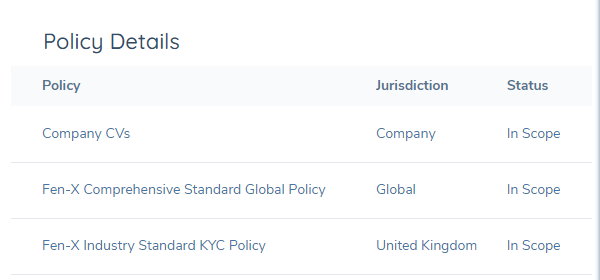
The Entity Profile Page will also display both the conditional and non-conditional fields configured in a Policy. A conditional field will only display on the Entity Profile Page if it was scoped during a Journey. A conditional field that was not triggered during a Journey will not appear on the Entity Profile Page.
A User can see the Policies that have been scoped for an Entity from the "Policy Details" component visible on the Entity Profile Page. The Policy "Name", "Jurisdiction" and "Status" information is only visible to a User when they have been assigned the "Policy Search and Requirement Scope" permission. The "Policy Details" component can be used to quickly check the Policies that an Entity is in-scope for.