Using Data Groups
Some data points are captured once, while others can occur multiple times for each client. For example, a client has just one Date of Birth but can have multiple Addresses. These records have a one-to-many relationship with the client, and for these we use Data Groups.
Data Groups are flexible sets of data. As standard they are used for Addresses, Tax IDs, Contacts, and Products, but can be extended to any requirement.
Note that some Data Groups are mandatory for the operation of the system, such as Products. These can be updated but cannot be deleted.
Configuring Data Groups
To configure Data Groups, first go to Policy Configuration. Underneath the policies, users will see the Data Groups section that includes existing Data Groups.

Use the ‘+’ icon to create a new Data group. Alternatively, tick an existing Data Group and select the clone option to create a new version.

Users can choose a Name and a Description. The Name is the value that will appear in our Data Requirements as the Data Type option.
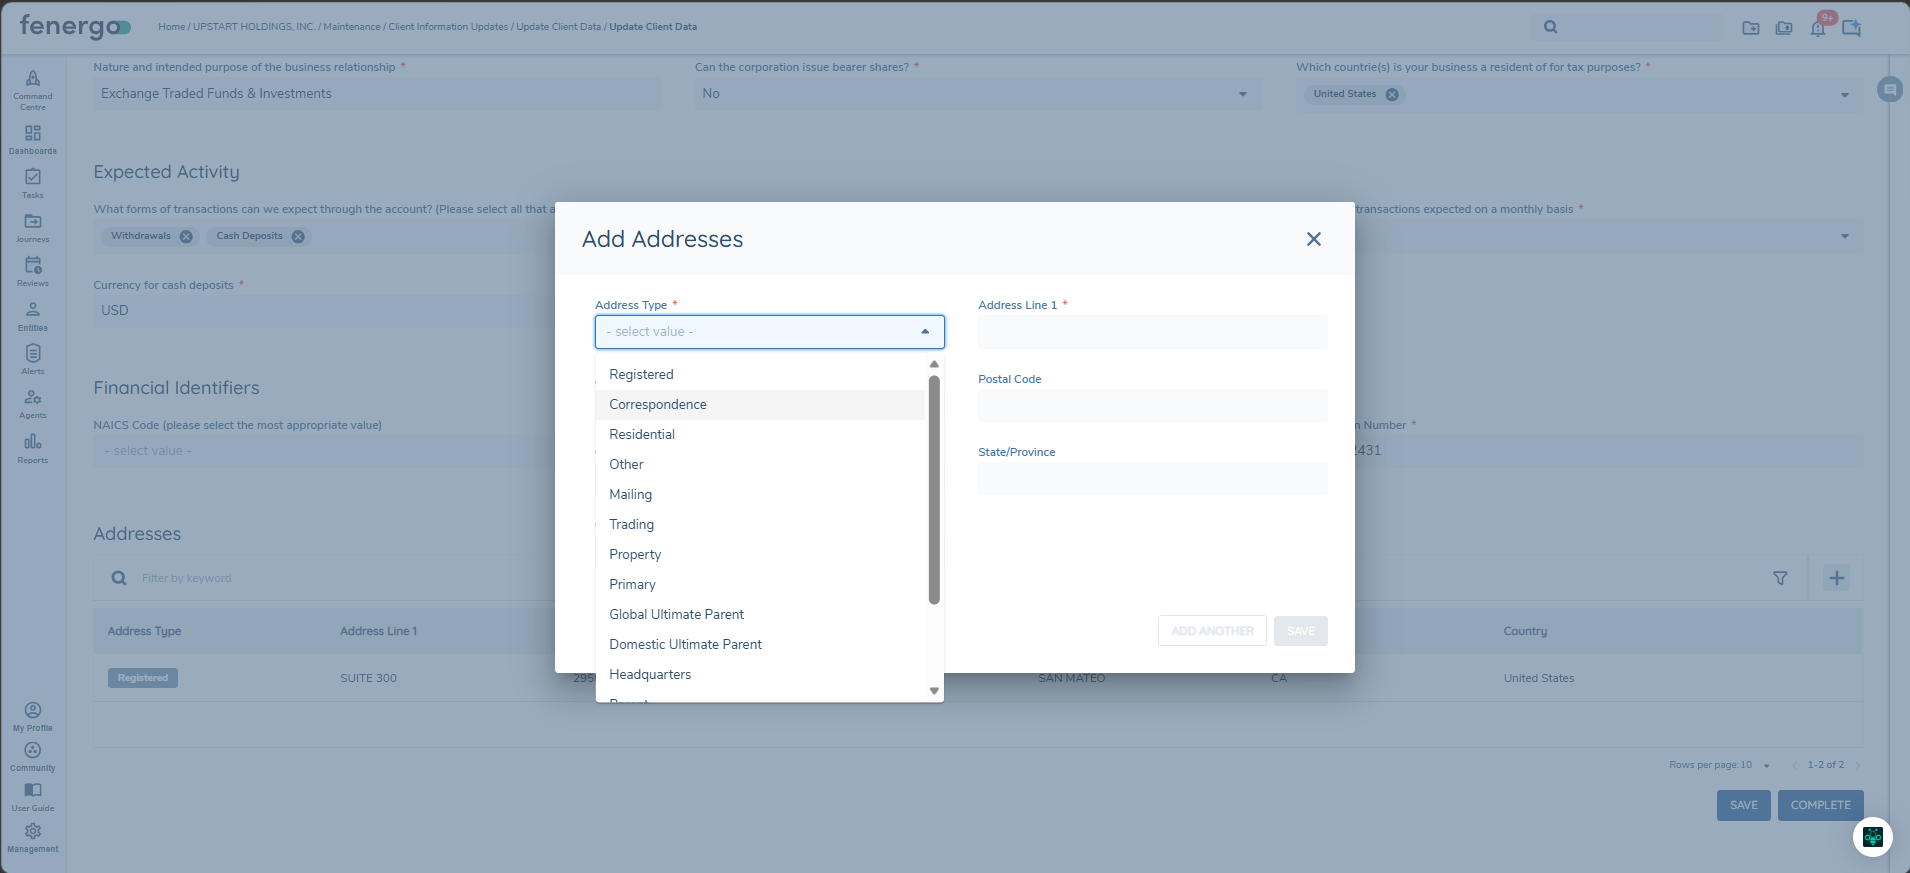
In situations where a data group record would require a one-to-many relationship with its owner, then the “ Multiple Data Group Cardinality ” toggle should be switched to active. This will allow a client to create multiple unique instances of a data group while capturing requirements for a journey e.g., Mailing Address, Residential Address, Commercial Address etc. See an example of Data Group capture below:
It is expected that most Data Groups will have multiple cardinality, for data like Tax IDs and Addresses. However, 1:1 single cardinality Data Group is available, in which case the data capture is presented as a single form. Note that single cardinality Data Groups are not supported in logic engine conditions. The form view provided by single-cardinality data groups can be achieved by using new Categories in data requirements.
Continuing with our new Data Group, click Save to load the Manage Fields section. This is where we start to add in the different fields that will make up our Data Group.
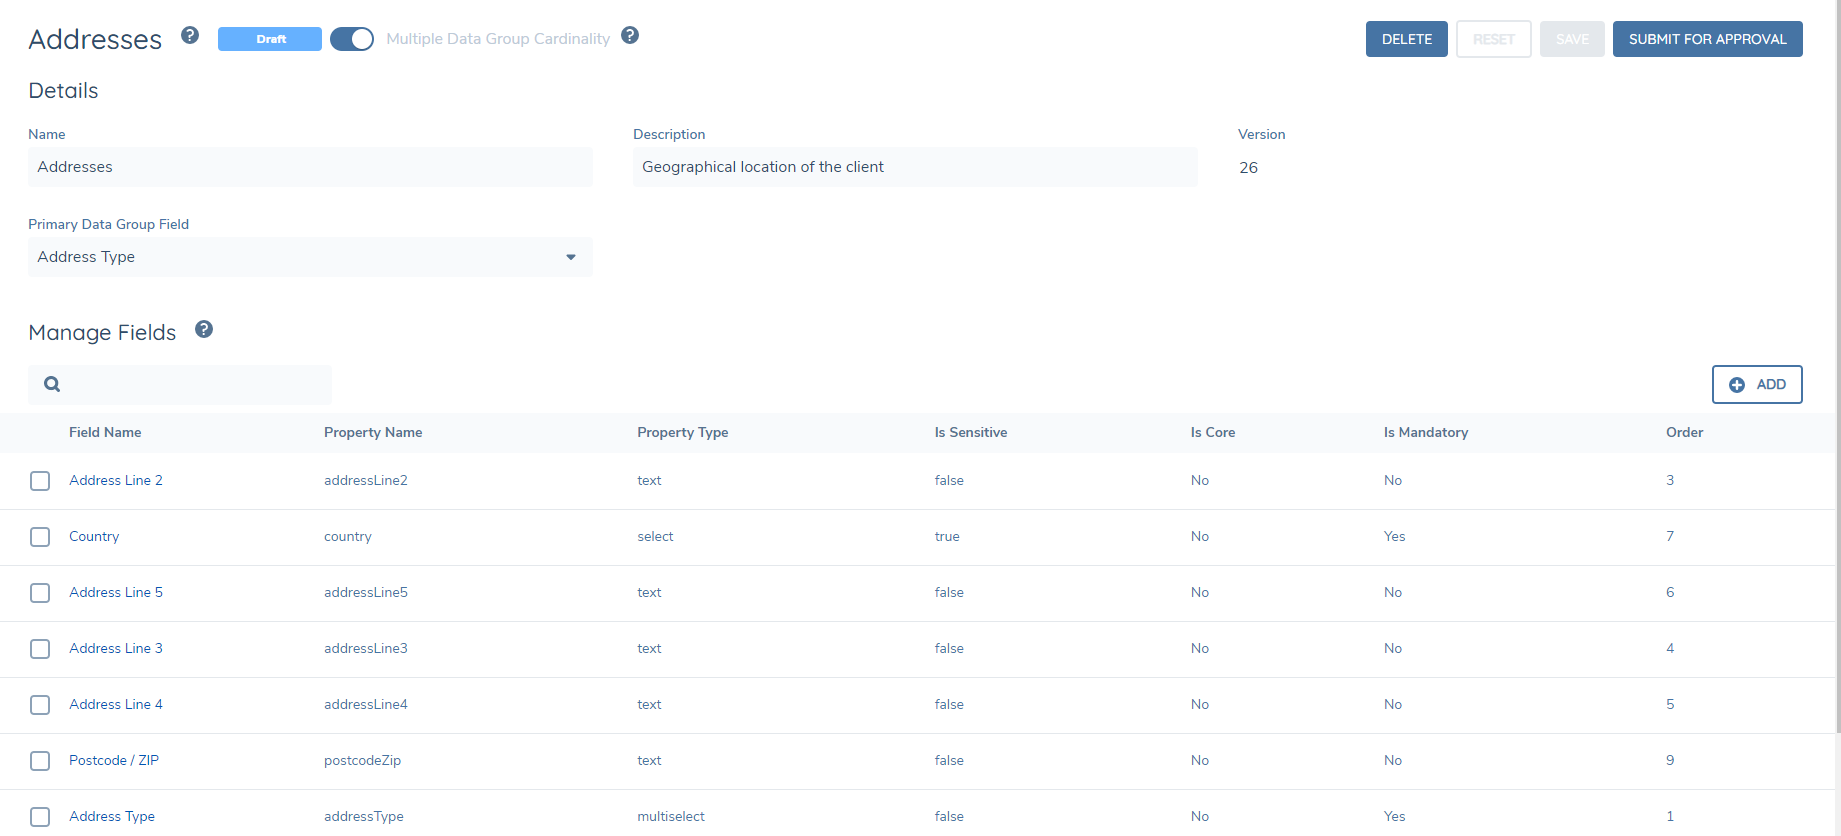
Click the ‘+ADD’ icon to start adding fields.
From this screen users can add in the fields that will make up the data group. Each data group field requirement behaves like policy data requirements.
In addition to the field details and data validation, a field order can be configured for each field.
The 'Disable multiple select on Primary Data Group field' toggle in Data Groups is to control the multi-select behaviour of the Primary Data Group field when adding new entries. By default, the Primary Data Group field allows multi-select functionality, enabling users to add multiple entries at once with the same key identifier but varying other fields. For example, if adding multiple addresses, users could select the same Address Type (e.g., Home, Work) for each entry while other details like Street Address and City may differ.
However, this can lead to issues with conditional fields not being captured correctly. To address this issue, the toggle allows users to disable multi-select behaviour, ensuring that only one entry can be added at a time using the Primary Data Group field as the key identifier. This toggle, labelled 'Disable multiple select on Primary Data Group field', gives users control over the data entry process.
Once the user is satisfied with the configuration, the data group version must be submitted and approved before it will appear in a journey. See Policy Versions for more information.
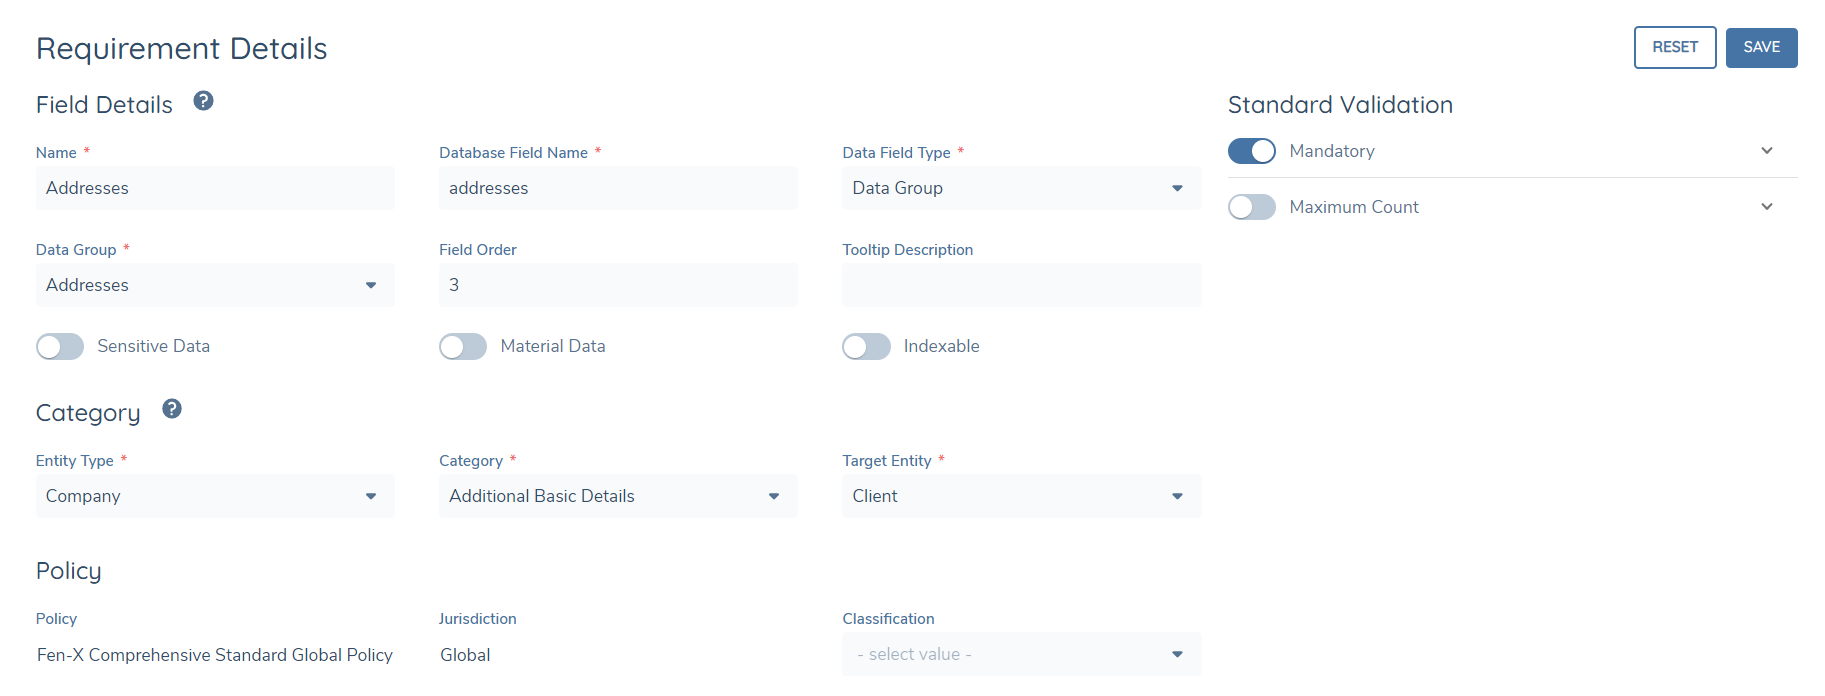
Data Groups fields are configured the same way as policy requirements are. They can use Data Validation and the Logic Engine using the same patterns. Refer to the Policy Requirements section for guidance on how to use these features.